Why should you include add to calendar links in emails?
Including add to calendar links in your emails is a convenient way to involve more people and increase event attendance. It allows the attendees to mark the event on their calendars, ensuring they can access important information and join without hassle.
Some benefits are listed as follows:
- Convenience for attendees: Add to calendar links allow recipients to add events to their calendars with a single click. This eliminates the hassle of manually entering event details, making it easier for attendees to remember and prioritize the event.
- Increased attendance: By reducing the friction involved in adding events, it can lead to higher attendance rates. When potential attendees can quickly save an event to their calendar, they are more likely to commit to attending.
- Cross-platform compatibility: These links are compatible with a wide range of calendar applications, ensuring that regardless of the platform your attendees use, they can easily add the event to their preferred calendar.
- Improved organization: Event organizers can include specific details such as reminders and locations directly within the ICS file. This helps attendees stay organized and informed about the event.
- Reduced no-shows: One of the biggest challenges in event management is the issue of no-shows. By providing an easy way to add events to calendars, ICS links help mitigate this problem, as attendees are less likely to forget about the event.
How to create add to calendar links in emails
There are two main ways for creating add to calendar links for your emails. Let’s go through them one by one:
1. By creating an event in Google Calendar
Creating an event in Google Calendar allows you to create direct event links that receivers can use to add events to their Google Calendar. Here’s how you can do it:
Step 1: Go to Google Calendar.
Step 2: Hover your mouse over the calendar you want to use. Then click on three dots > Settings and sharing.
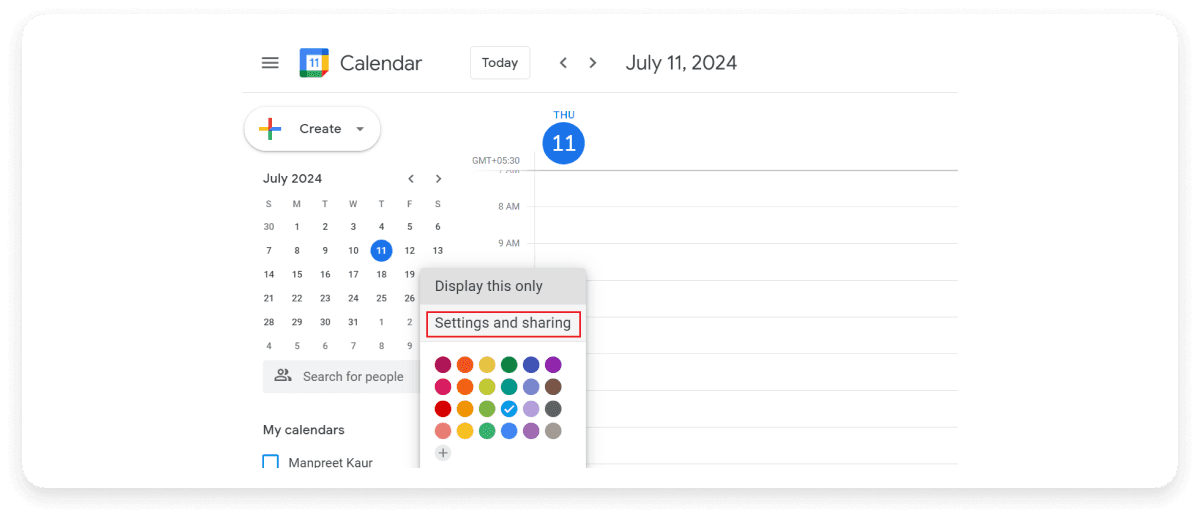
Step 3: Make your calendar public by placing a checkmark in the Make available to public box. Ensure the See all events details button is enabled.

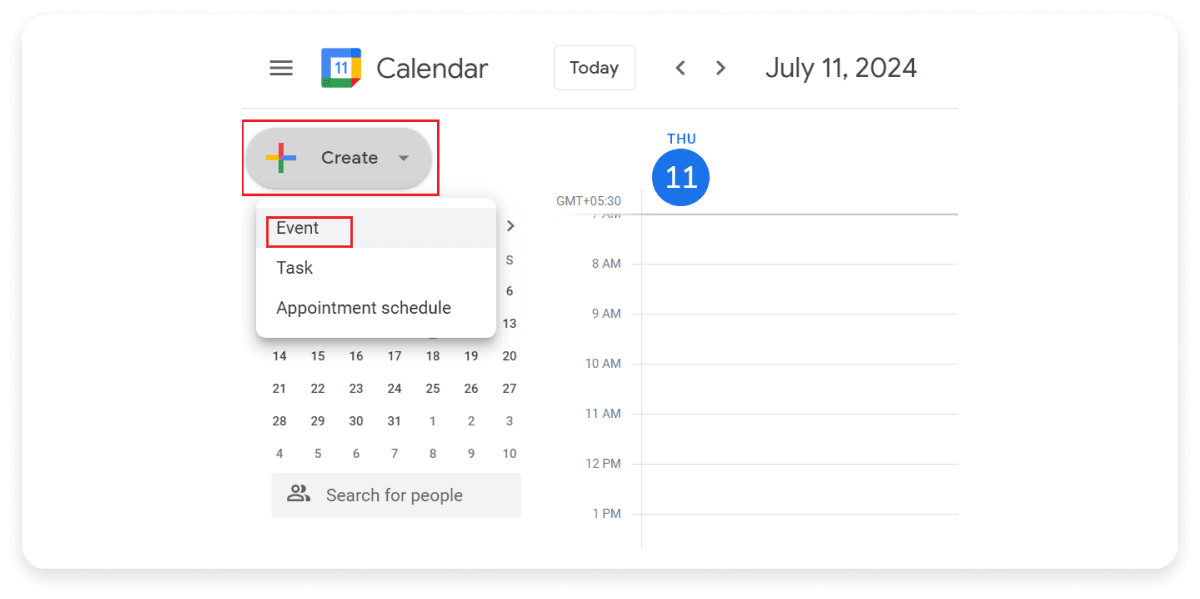
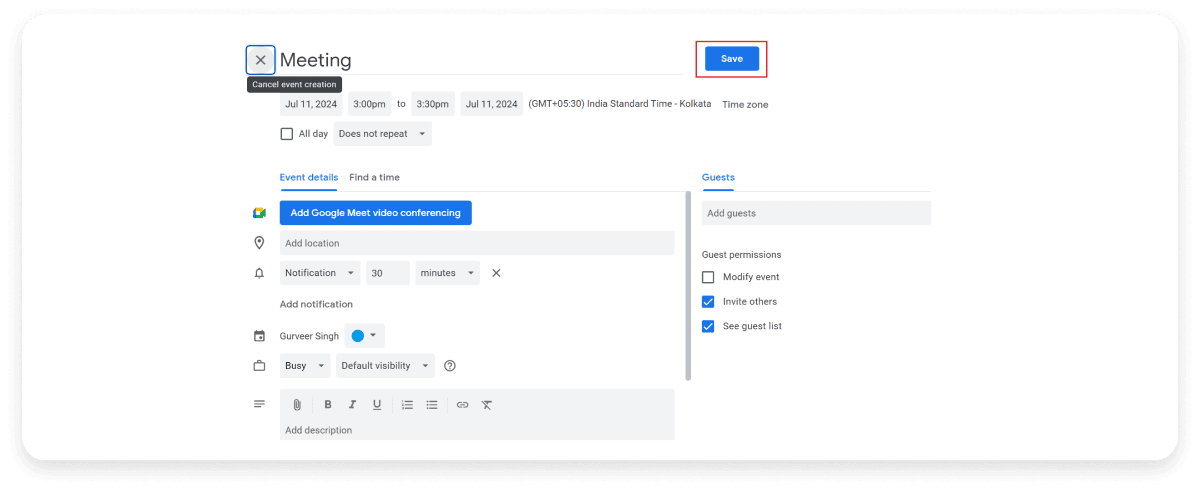
Step 4: Go back to your calendar. Click Create > Event.
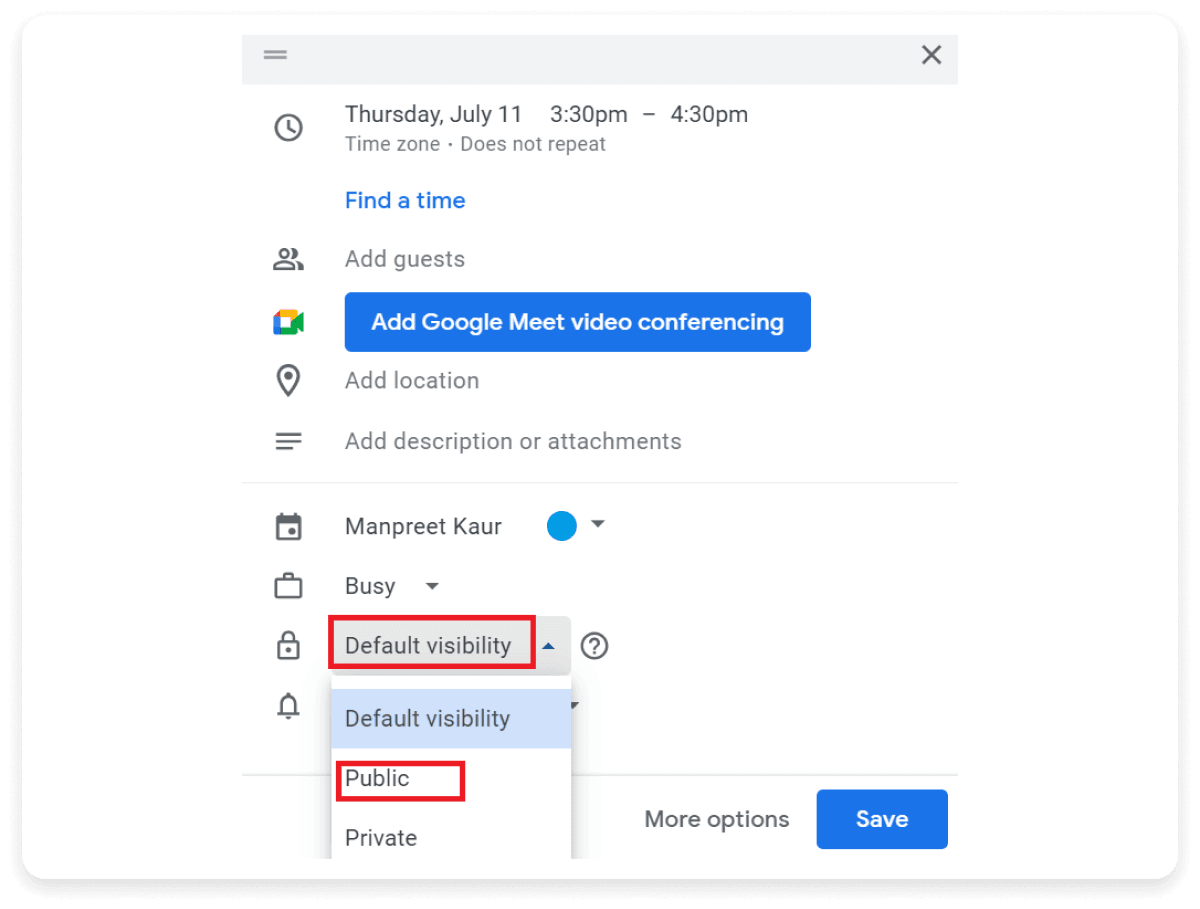
Step 5: Add the title, time, and other details for the event. Click on the Default visibility dropdown and select Public. Click Save.
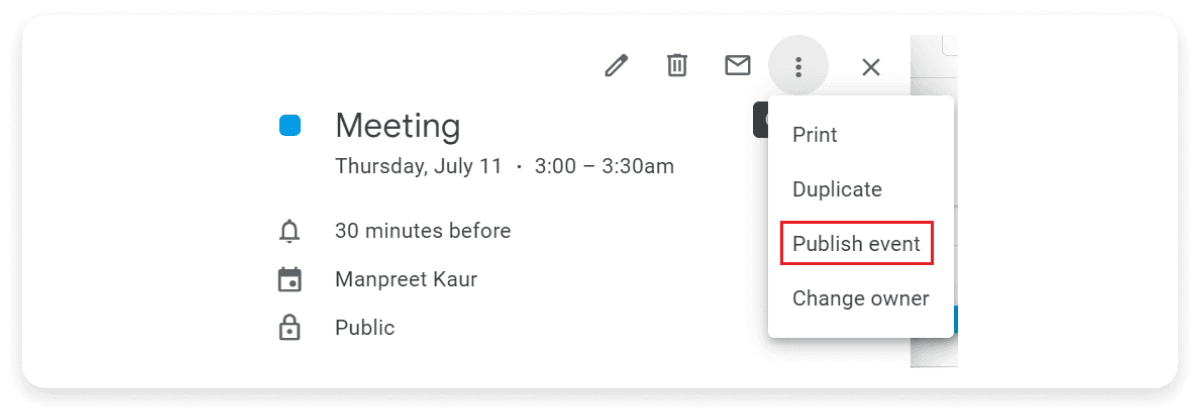
Step 6: Click on the Calendar entry to open a popup and then click on three dots > Publish event.
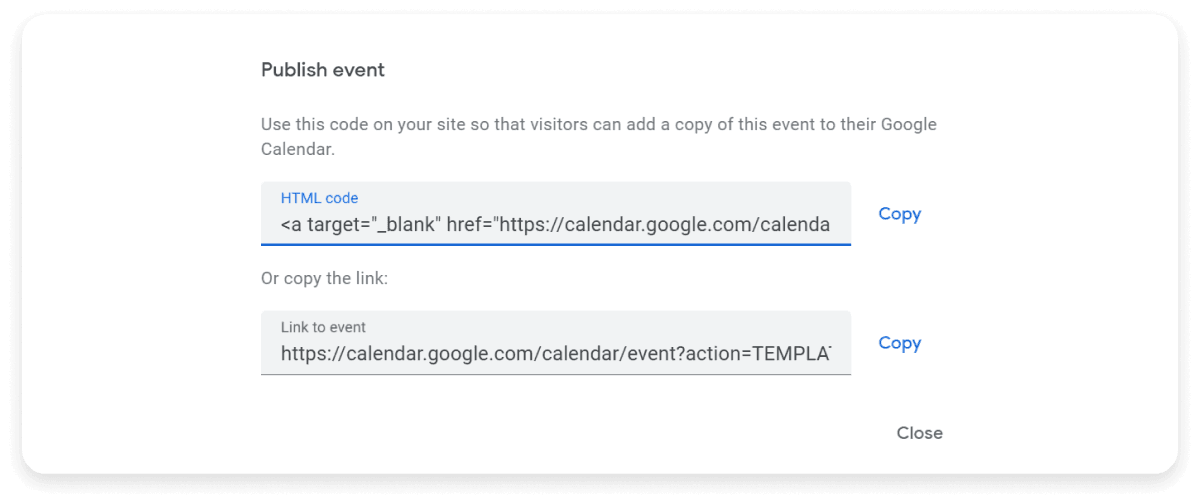
Step 7: Copy the ‘link to the event’ URL.
Step 8: Add the copied link as a hyperlink to the “Add to Calendar” text or the anchor text that you desire and send it to the target audience.
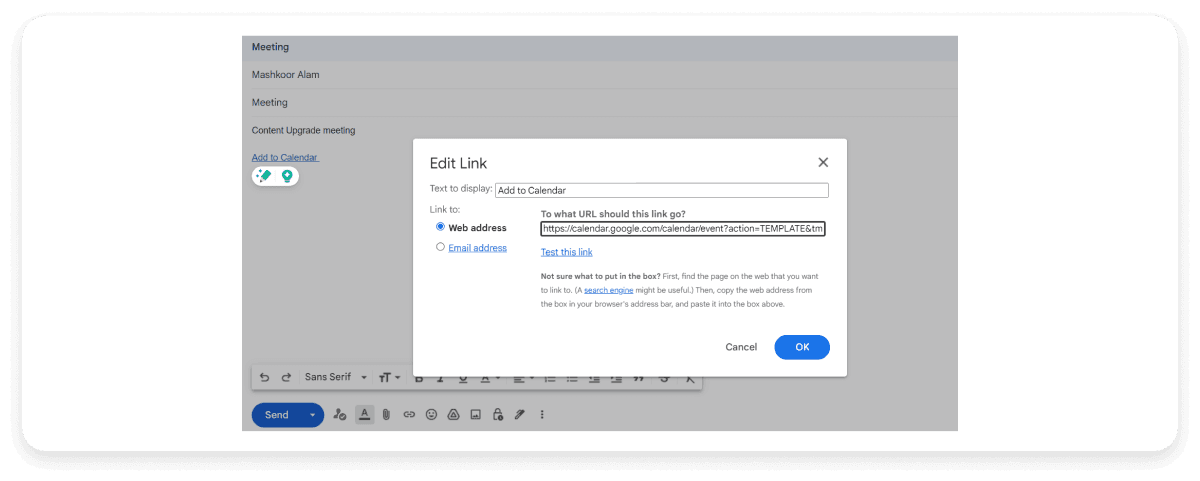
What happens then?
Your recipients will receive an email as shown below.

When they click on Add to Calendar, they’ll be able to save the event to their calendars, as shown in the image below.
2. Exporting the .ics file from Google Calendar
An ICS file is a calendar file that contains important details of the events, such as the event’s title, time, date, location, and description. This format is widely supported by various calendar applications, including Google Calendar, Microsoft Outlook, and Apple Calendar.
When a user clicks on an ICS link, it prompts them to download an ICS file containing all the relevant details of the event, such as the title, date, time, location, and description. The purpose of an ICS link is to simplify the process of adding events to calendars, reducing the likelihood of forgetfulness and improving overall event attendance.
Here’s how you can export it from your Google Calendar.
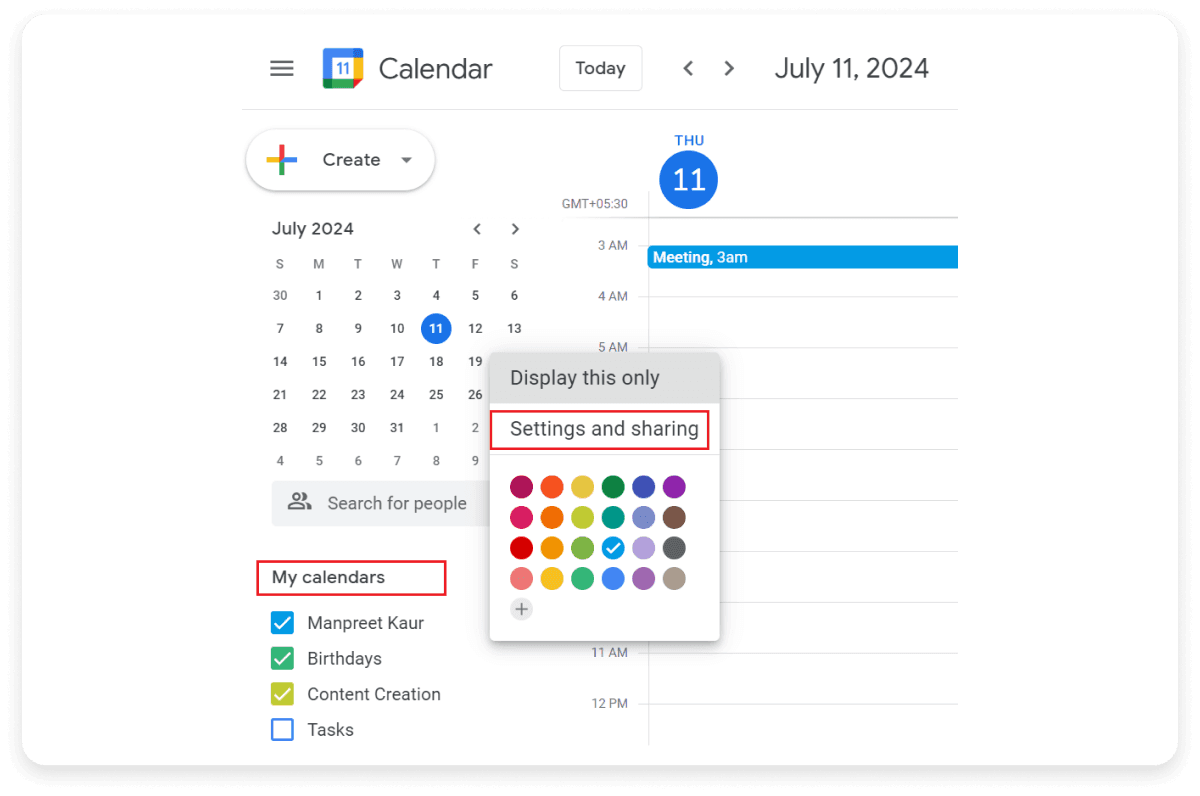
Step 1: Open Google Calendar and navigate to the My Calendar section.
Step 2: Select the calendar you want to export and click on the three dots. Choose Settings and sharing.
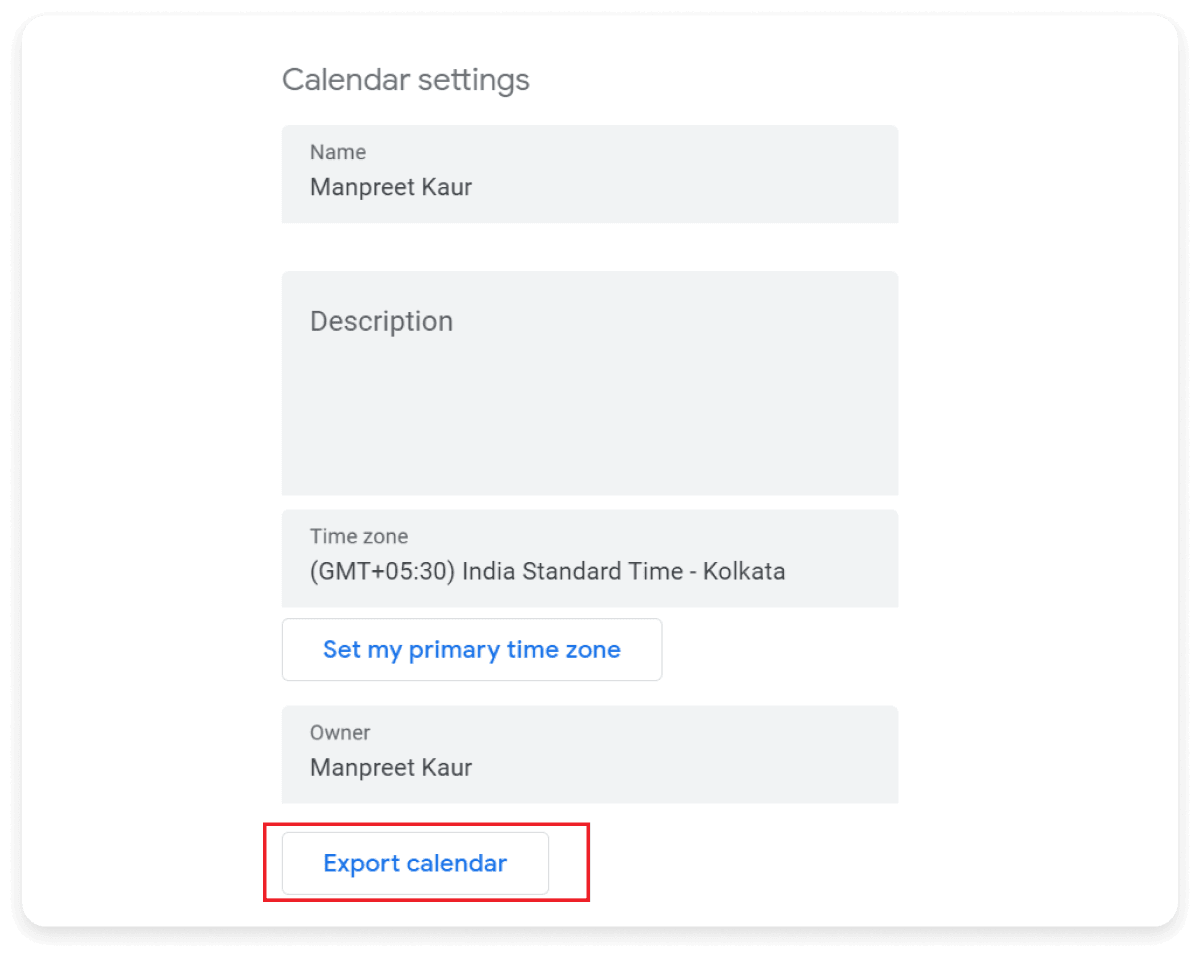
Step 3: Under Calendar settings, click on Export calendar, and a ZIP file with a .ics file will be downloaded to your computer.
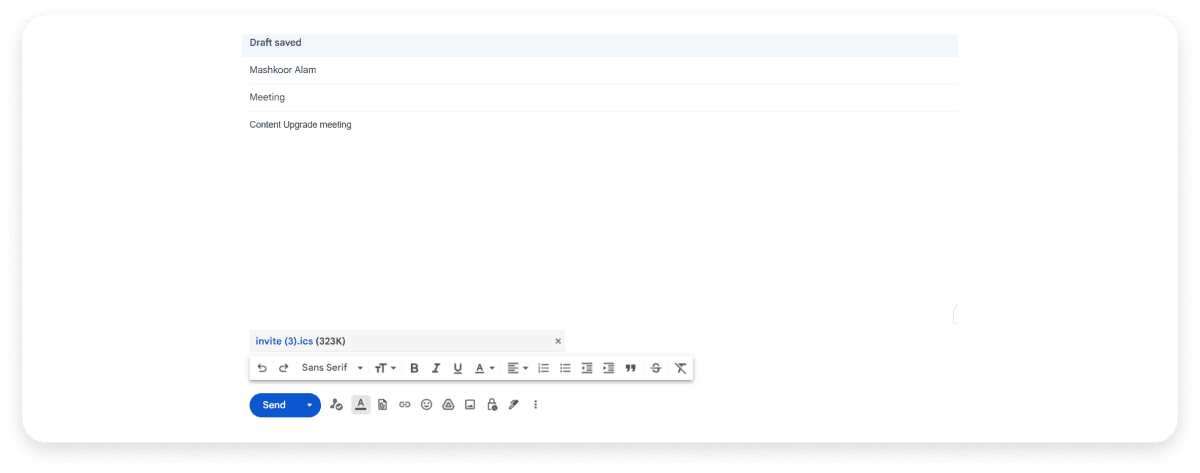
Step 4: Attach the .ics file to your email template and send it to your recipients.
What happens next?
When the recipients receive the email, they can download the .ics file and import it to add to their calendars.
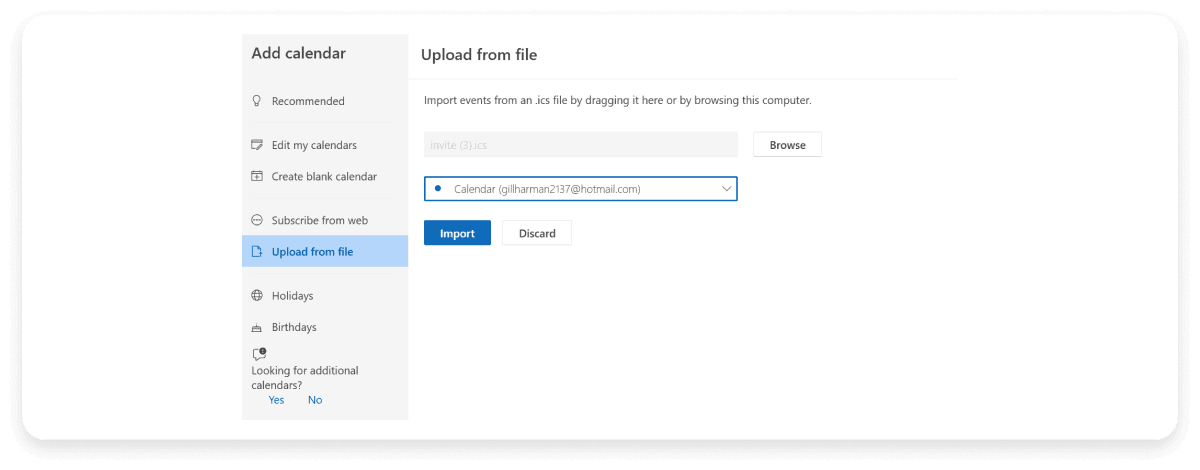
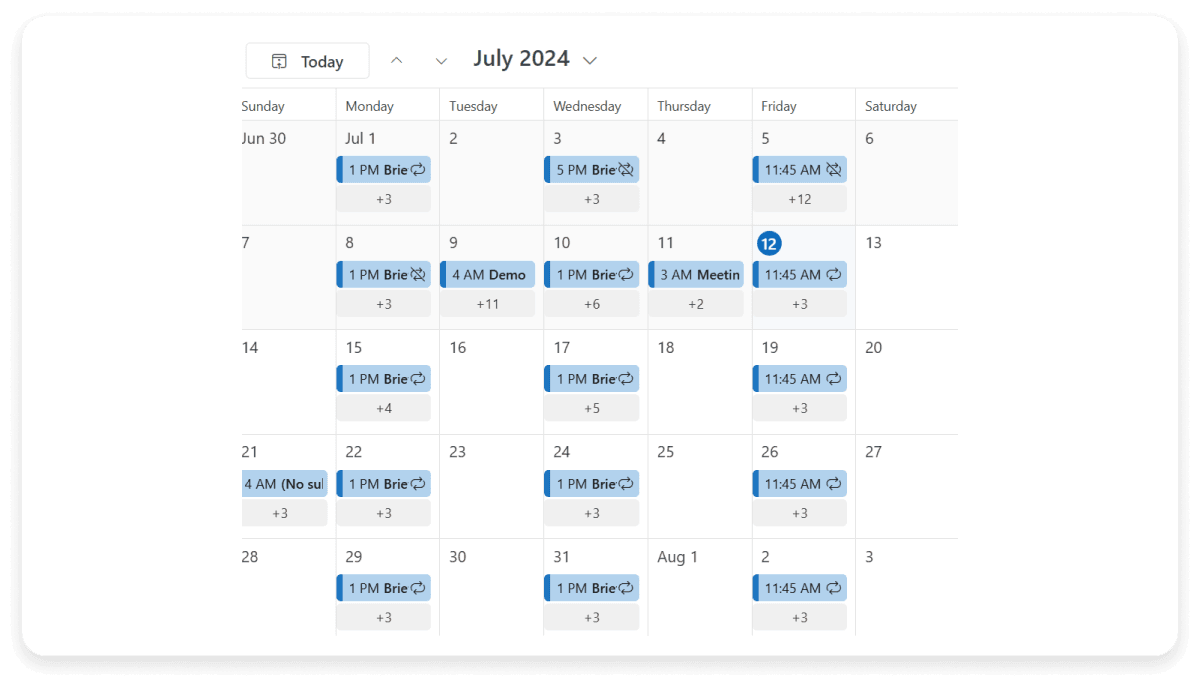
The drawback of this method is that it imports the entire calendar you choose, with all the events in that calendar. You can see a glimpse of how all the events of a particular calendar were imported to the calendar of another instead of just one event.
Instead of relying on Google Calendar and .ics files, it is recommended to use Mailmodo’s add to calendar widget, which helps you embed a calendar widget in a user-friendly manner and offers customization options. Mailmodo also has a drag-and-drop email builder, a library of editable templates and allows you to create and send interactive emails without any coding. This enhances the overall visual appeal of your emails as well as engagement. Mailmodo also have some other unique features that you can check out.
This process has two parts if you’re doing it for the first time on Mailmodo. Here’s how you go about it if you have your event created on Google Calendar:
Integrate Google Calendar with Mailmodo
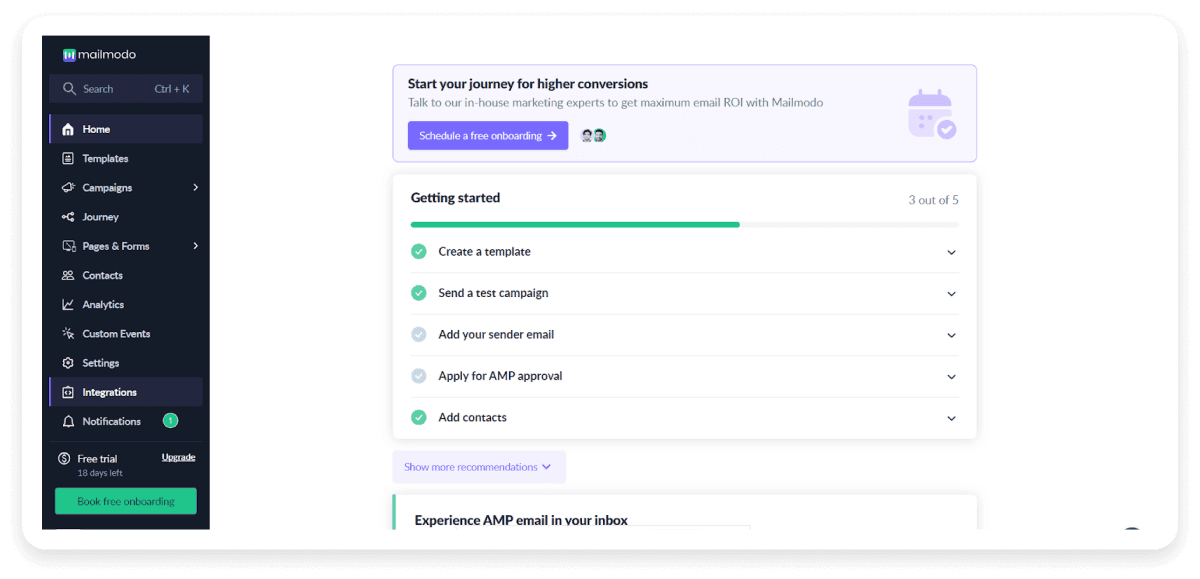
Step 1: Go to the Mailmodo dashboard and navigate to integrations.
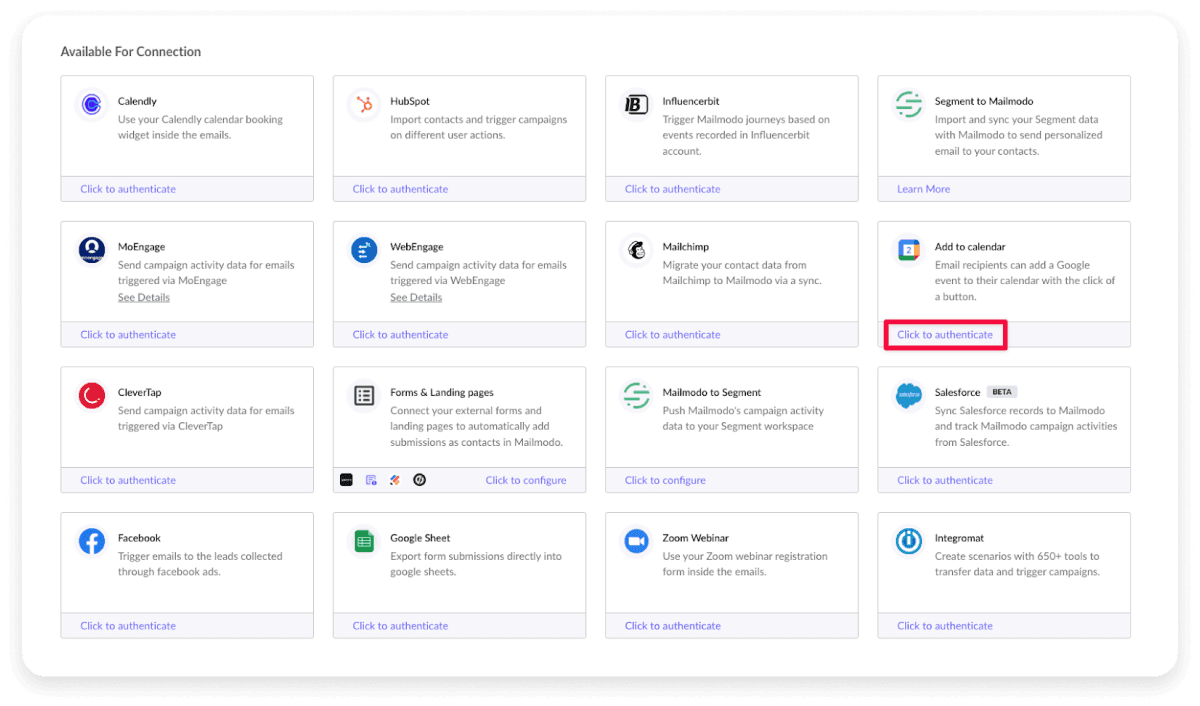
Step 2: Find Google Calendar among the available integrations and click on click to authenticate.
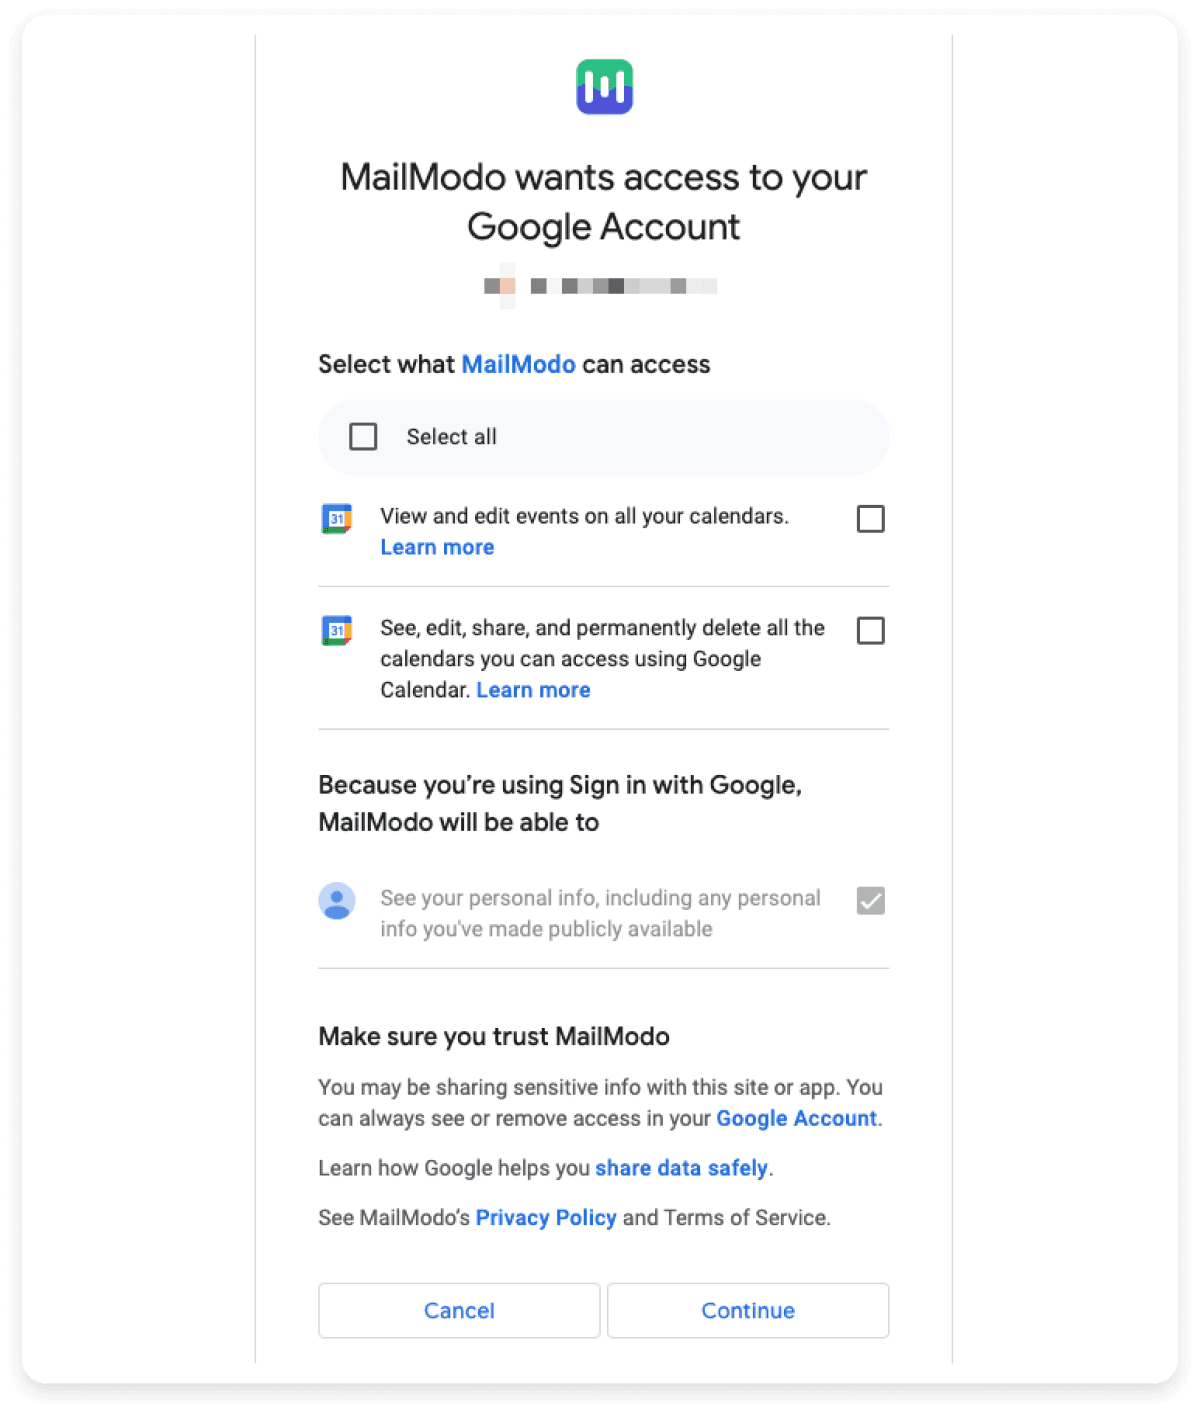
Step 3: Grant Mailmodo permission to view and edit events across your calendars and access, edit, share, and delete calendars.
Following the integration, Google Calendar will be listed under connected platforms, as shown below.
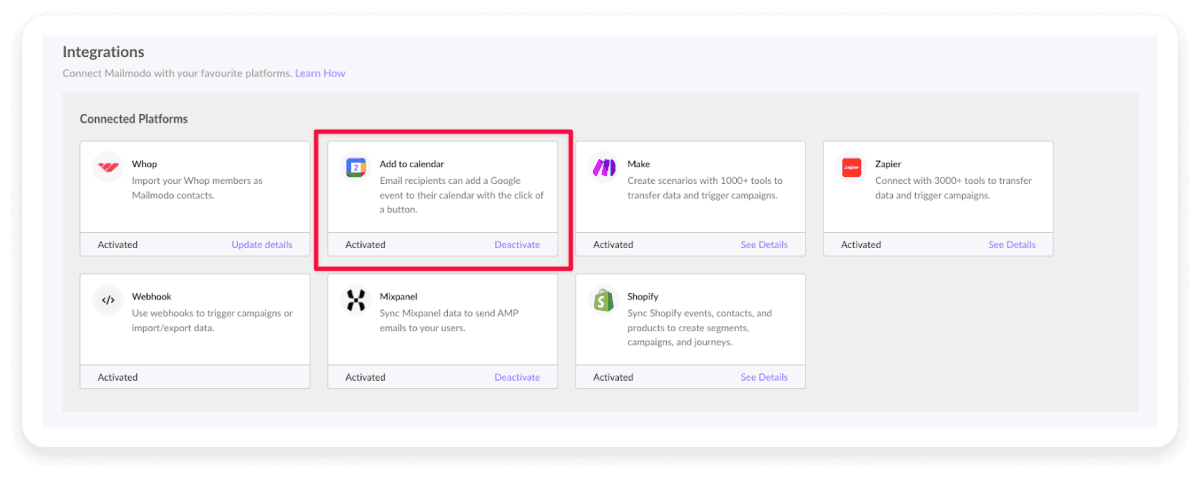
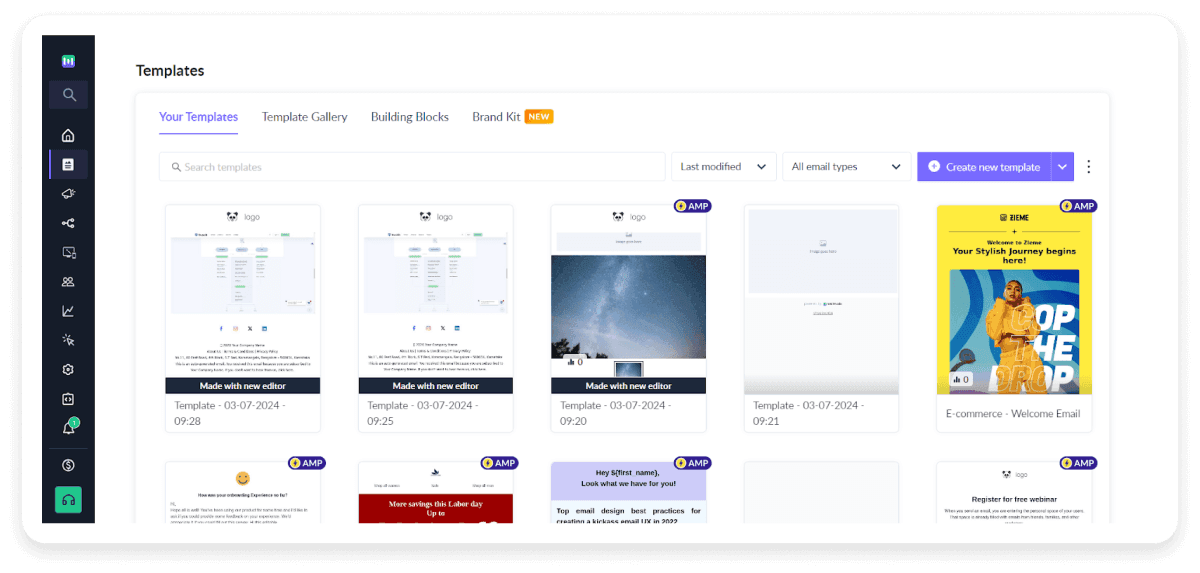
Step 1: Open the editor, go to templates, and click on create new template if you want to start afresh or choose from one of the existing templates.
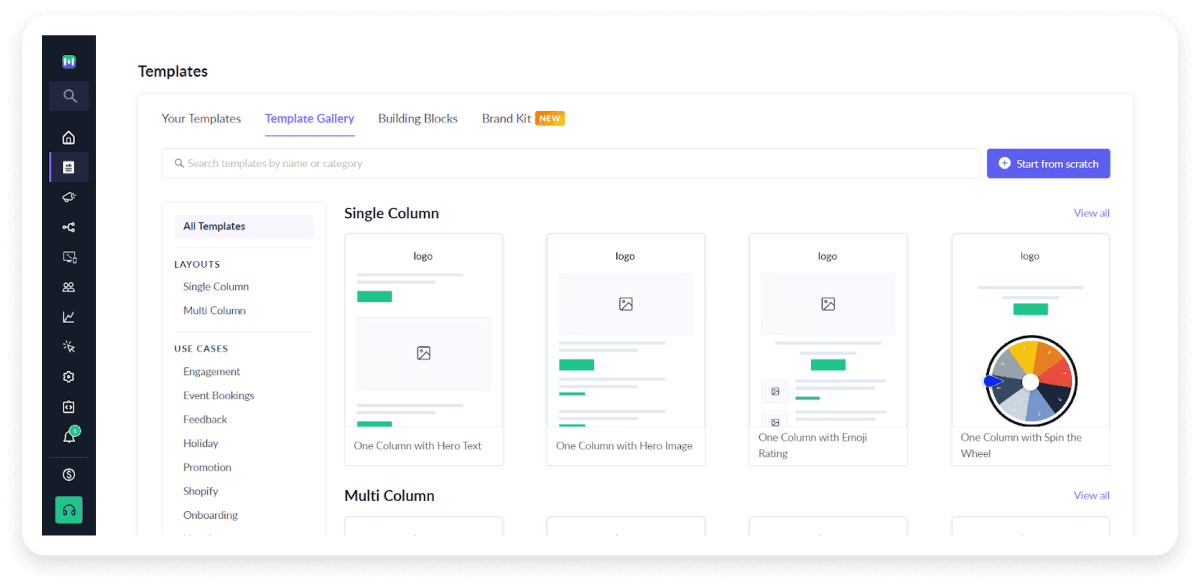
Step 2: If you’re starting afresh, click start from scratch.
Step 3: Go to widgets. Search for Add to calendar widget under Scheduling.
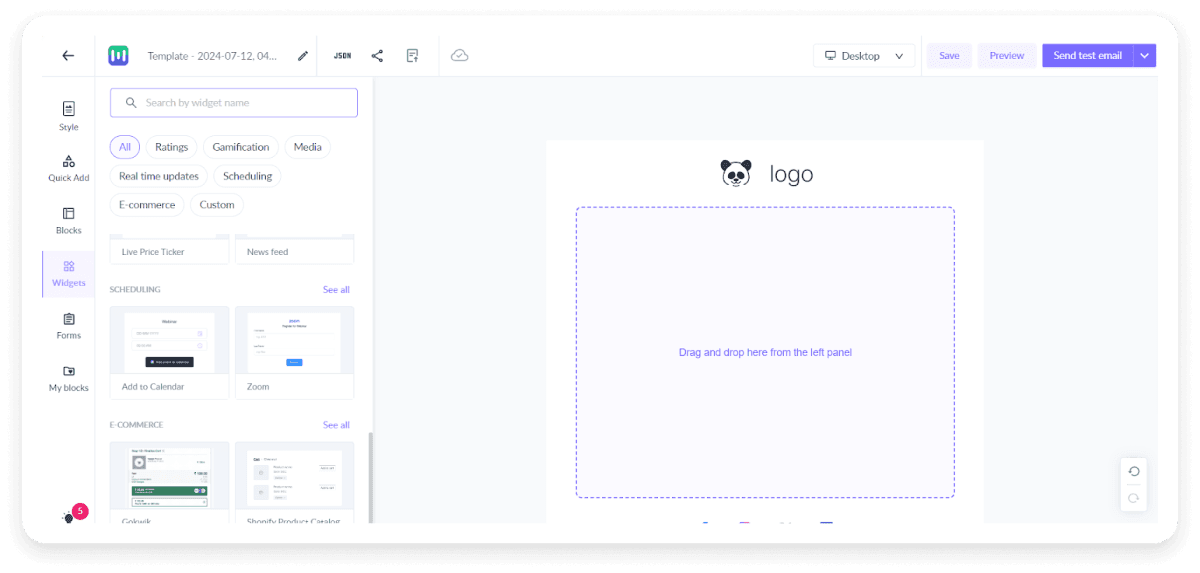
Step 4: Drag and drop the Add to calendar widget in your email template.
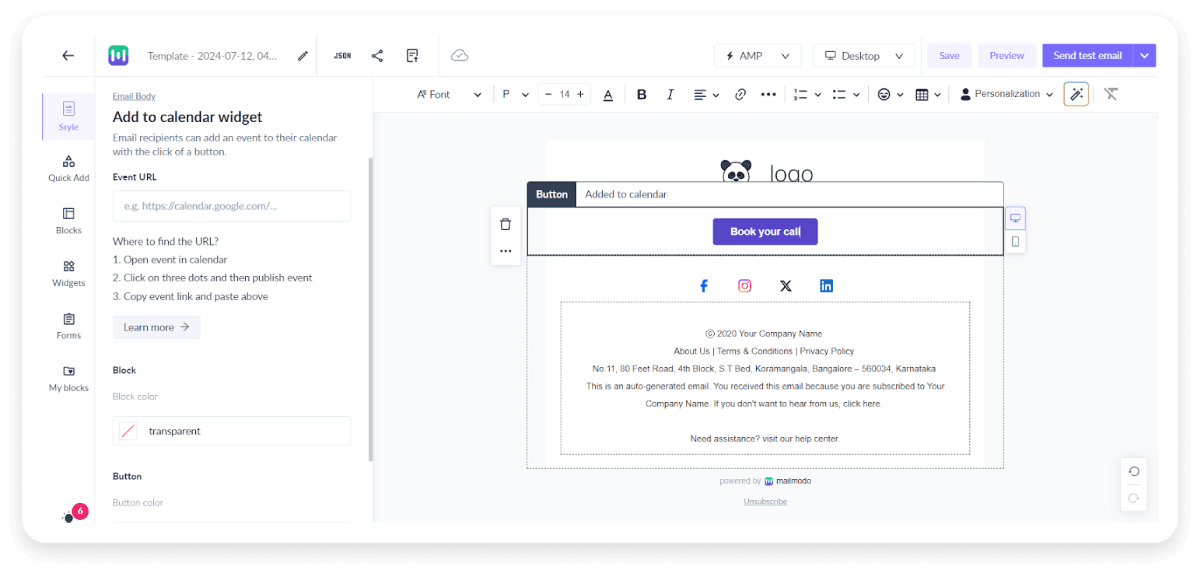
Step 5: You can edit the copy of the add to calendar button to read “Book your call” or “Check your calendar for the event” or whatever suits your need.
Step 6: Enter the event URL in the event URL button. The calendar URL is available when you publish an event in Google Calendar, like shown in the image below.

You can also customize the block color, button color, and alignment under the add to calendar widget section on the left side as can be seen under step 4..
Step 7: Preview your template and send a test email to check how the email will appear in the receiver’s inbox.
Step 8: Click save.
You can then send this to your recipients. This is how your email would look with the Add to Calendar widget. You can choose to design it any way you like and include carousels, images, forms and other interactive elements.

Isn’t it attractive?
These interactive features not only make your emails engaging but also increase the likelihood of higher engagement and attendance for your events.
Send your event invitation emails with Mailmodo
Final takeaway
Including add to calendar links in your emails is a great way to improve event attendance, ensuring your recipients stay informed about important dates. You can choose any method – integrate the add to calendar link through email clients, create an ICS file, use link generators, or use Mailmodo’s add to calendar widget. Using Mailmodo is a great choice since the platform provides a simple and intuitive interface to create and send customized emails with calendar invites. The recipients can easily add an event to their calendar with a click of a button and get reminder notifications to attend it, eventually increasing event attendance.


