Why should you compress photos for email?
While adding photos can enrich your messages, uncompressed images can lead to various problems. There can be several reasons why someone might need to compress pictures for email. Let us take a look at some of the most common reasons.
Avoid email size limits
Most email providers impose a limit on the size of image attachments, typically ranging from 10-25 MB per email. High-resolution photos can easily exceed these limits, especially when sending multiple images. Compressing photos reduces their file size, helping you stay within these limits and ensuring your email is sent without any issues.
Faster sending and receiving
Uploading and sending large files can be time-consuming and frustrating, especially when you need to send an email quickly. Similarly, recipients might experience delays in downloading large attachments, especially if they have a slower internet connection. Compressing your photos can significantly speed up the entire process, making it much more efficient for everyone.
Save inbox space
Both your sent folder and the recipient's inbox have storage limits. Sending uncompressed photos not only takes up more space in your "Sent" folder but also consumes more space in the recipient's inbox. Even if you decide to send the photos in different emails, over time, this can lead to a cluttered inbox, making it harder to manage and potentially causing emails to be bounced back if the inbox is full. Compressed images take up less space, helping to keep your inbox organized and functional.
Maintain image quality
People often worry that compressing might reduce the quality of original images. However, modern compression techniques are designed to keep the quality high while making the file size smaller. You can significantly reduce file size while maintaining clear, sharp images that look professional. This balance is essential for business communications, where image quality reflects on your brand.
How to Compress Photos for Email
To compress photos for emails, the key is to reduce their file size while preserving as much quality as possible. This can be done either with the help of various online tools or with any software that resizes or adjusts the resolution of your images.
Step 1: Go to TinyPNG. Select an image from your folder by clicking on the area labeled Drop your images here or just drag and drop the file in this area.
 Step 2: Allow the image to upload and undergo automatic compression.

Step 3: After image compression, click the Download All button to retrieve the compressed image.

Using Microsoft Paint
Microsoft Paint, or “MS Paint,” is a basic graphics editing program included with Windows. It’s a handy tool for compressing photos because it’s pre-installed on most computers and doesn’t require additional software. With its simple, user-friendly interface, Paint allows even those with minimal technical skills to quickly resize and compress images.
Using built-in software is often better as it allows for quick edits without relying on an internet connection, which can be especially useful when you're working offline or need to compress images in a secure environment.
Here’s a step-by-step guide to use Microsoft Paint.
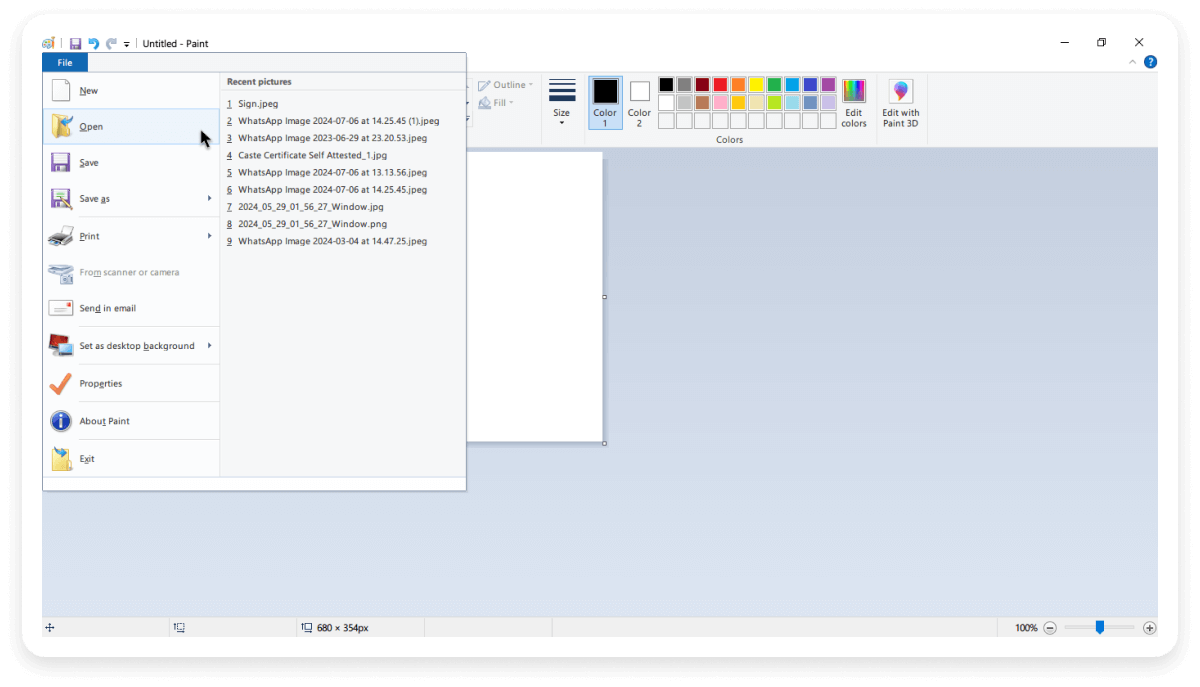
Step 1: Open MS Paint and open the image using “Open” option under “File” from the “Menu”

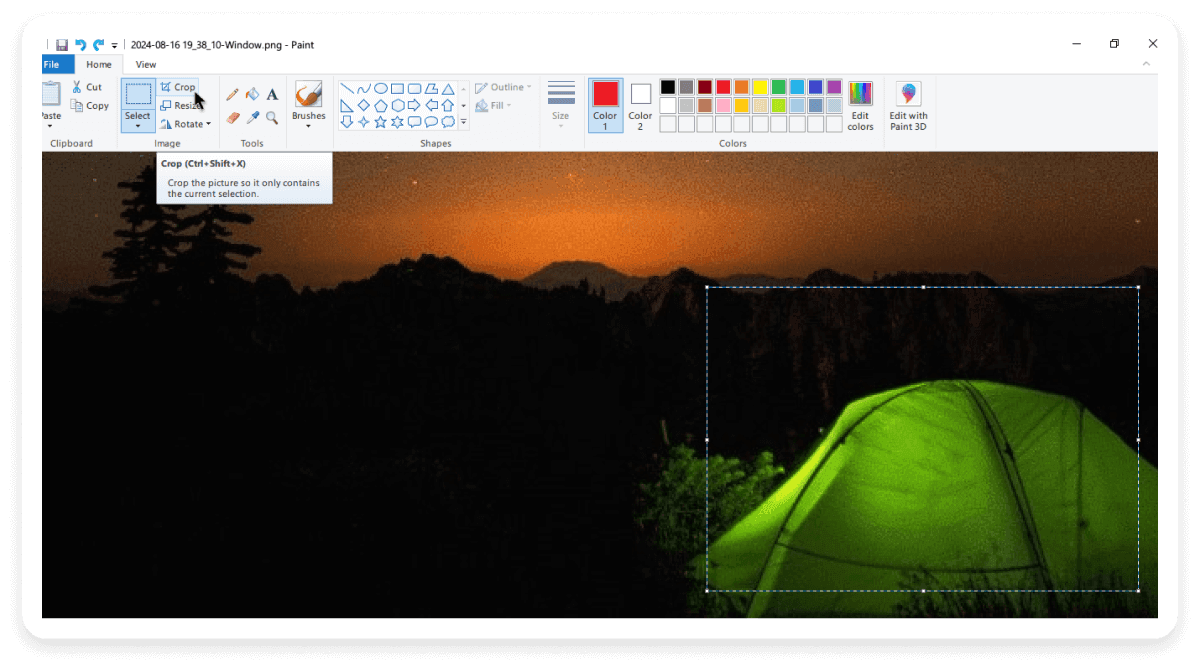
Step 2: Pick the "Select" tool from the Home tab and drag a box on the image to select a portion for cropping, if desired. Press "Crop" to cut the image down to the selection.

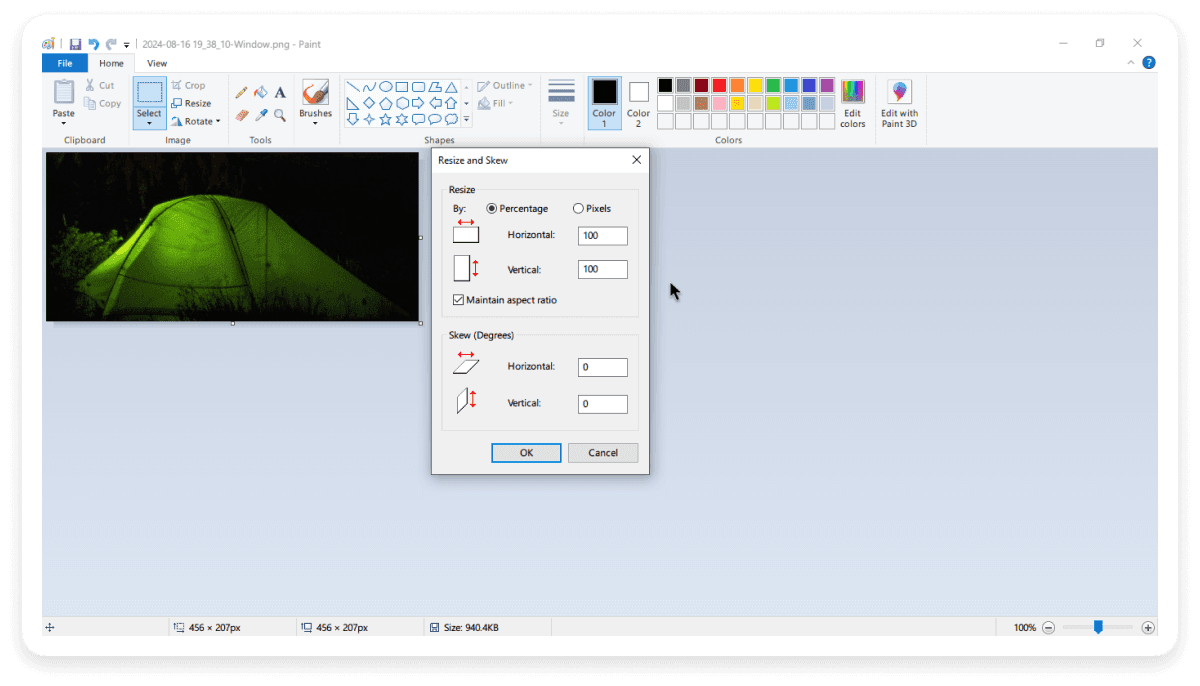
Step 3: Click the "Resize" option to lower the entire image's resolution by shrinking its dimensions. Choose "Pixels" if you know the exact size you want or enter a percentage. Keep the "Maintain Aspect Ratio" checked to avoid a distorted image. Enter either the width or height, and Paint will automatically adjust the other size. Click "OK".

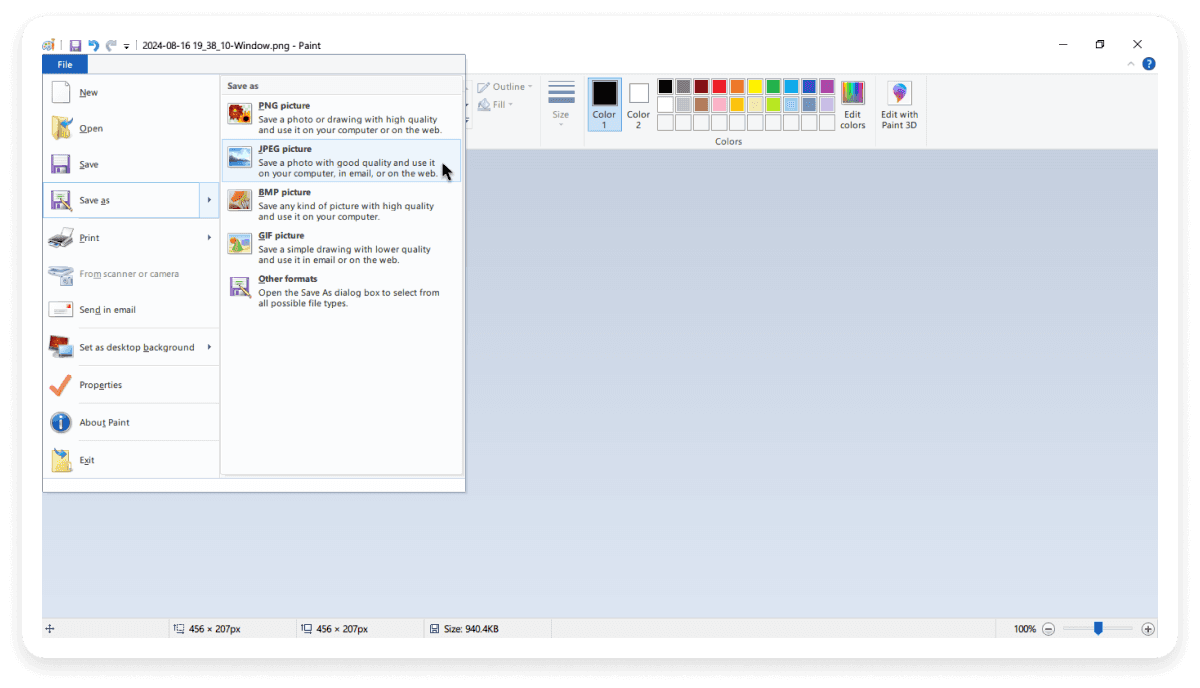
Step 4: Open the "File" menu and click on "Save As" and pick "JPEG Picture" to save the image without overwriting the original.

Conclusion
Compressing photos for emails is essential for smooth communication and a better user experience. Simple tools like TinyPNG and Microsoft Paint make photo compression easy, improving email efficiency and showing professionalism. Whether you use online tools or built-in software, compressing photos ensures a polished and hassle-free email process.


 Step 2: Allow the image to upload and undergo automatic compression.


