Email is an indispensable tool for brands, widely used for nurturing leads, engaging customers, and driving conversions. However, managing and tracking individual email interactions with a large number of customers can be daunting. It also becomes nearly impossible to send personalized emails that are relevant to individual customers if you have a huge customer base. This is where email workflows come into play.
In this guide, we’ll discuss what an email workflow is, its importance, and how you can create a workflow using Mailmodo to optimize your email marketing efforts.
What is an email workflow?
An email workflow is a series of automated emails triggered by user behavior or actions such as signing up, clicking, viewing, or making a purchase. These workflows are designed to engage subscribers and make it easy to nurture leads, onboard new customers, and help them through the customer journey, to convert them into paying customers.
These automated workflows make it easy to send emails, saving time and ensuring personalized communication with subscribers according to their behavior and preferences. Some common email workflows include welcome emails, onboarding emails, nurture campaigns, and abandoned cart emails.
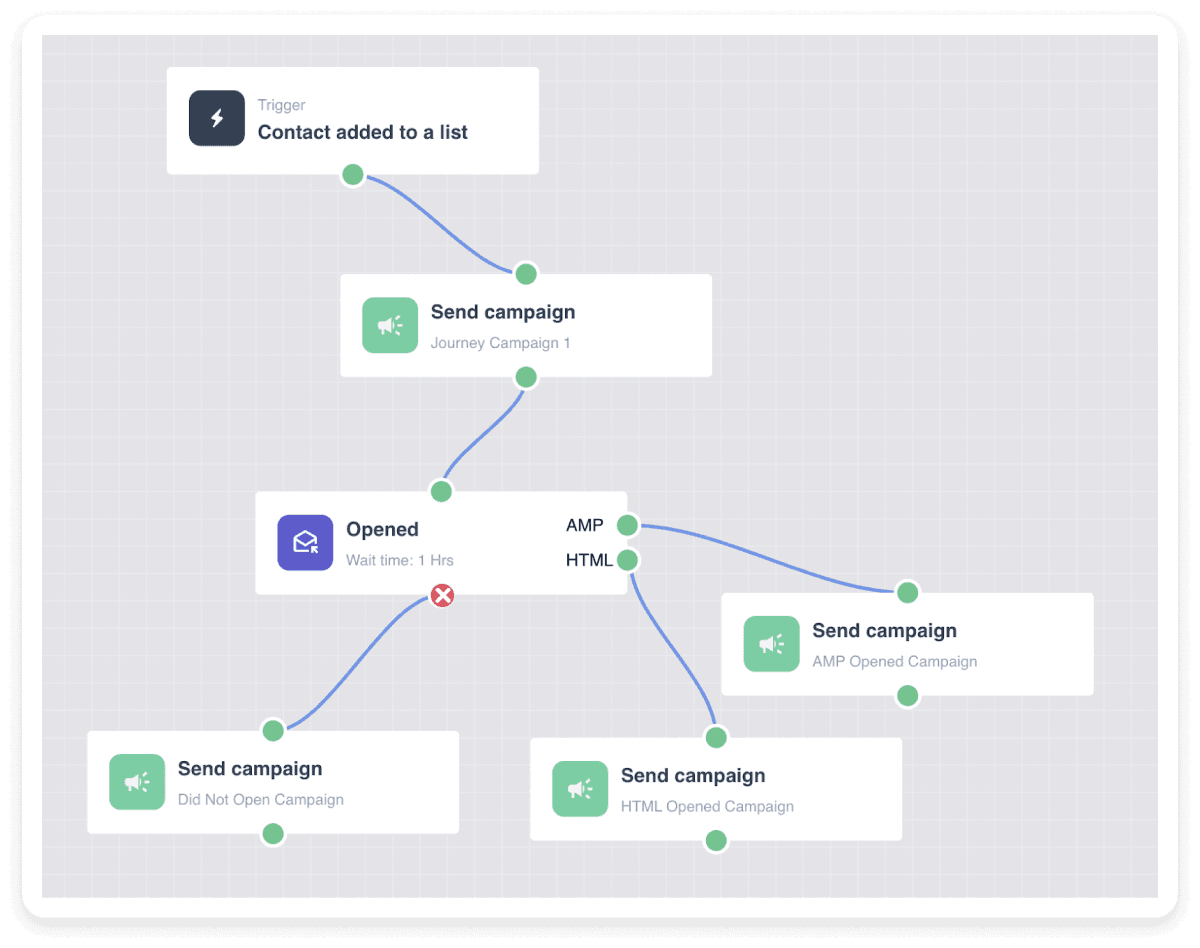
Take a look at this example of a workflow that sends a campaign to any contact that gets added to the defined contact list and sends subsequent emails based on their action.
Why do you need an email workflow?
The ultimate aim of email workflows is to nurture leads, build relationships, and encourage people to take the desired action, such as registering for a webinar or purchasing a product.
By automating the process of sending emails based on specific criteria and conditions, email workflows eliminate the need to send emails manually. This allows marketers to focus on more important tasks. This also ensures your email marketing campaigns scale, as your target audience expands.
Email workflows also help you to deliver relevant content that resonates with the customer’s stage in the journey, moving leads through the sales funnel. One great way is to send a welcome email series to new subscribers or a special discount on a customer’s birthday and send them a relevant email depending on whether they interacted with your previous email or not. This increases email engagement rates since people are more likely to respond to content that aligns with their preferences.
Email workflow vs. drip campaign vs. email journey
ESPs sometimes use the terms customer journey, drip campaign, and email workflow interchangeably. However, there are considerable differences among the three. Let’s explore them one by one.
Email workflow
An email workflow is a visual representation of a sequence of automated emails sent to recipients. It includes steps and actions triggered by user behavior or specific events ensuring timely and relevant communication.
You can use workflows to design and visualize the entire email sequence, making it easier to understand and manage each step and condition.
Email journey
An email journey is an automated process that sends targeted emails to customers depending on their stage in the customer journey, specific actions or triggers. It focuses on nurturing leads, engaging them, and finally leading them to take the desired action, such as signing up for a service or buying a product.
Drip campaign
A drip campaign is an automation that consists of a series of emails that are sent to the recipients after defined intervals.
Here’s a table that distinguishes between an email workflow, an email journey, and a drip campaign.
| Aspect | Email Workflow | Email Journey | Drip Campaign |
|---|---|---|---|
| Definition | A series of automated emails triggered by specific criteria or actions. | A comprehensive, multi-step email process personalized to guide a customer through various stages. | A series of pre-written emails sent at regular intervals. |
| Purpose | To automate tasks and deliver exclusive content based on actions or conditions. | To provide a personalized experience, guiding the recipient through a tailored path. | To nurture leads or customers with a steady stream of content at the right time. |
| Trigger | Time-based | Action-based | Behavior-based |
If you want to build an email workflow, an efficient way is to use an ESP that offers an email workflow builder. For example, Mailmodo offers an intuitive platform for email workflow automation by specifying different trigger events, conditions, actions, and delays.
How to create an email workflow in Mailmodo
Creating email workflows using Mailmodo’s visual email journey is as easy as it gets. Here are the steps you can follow to create one for yourself.
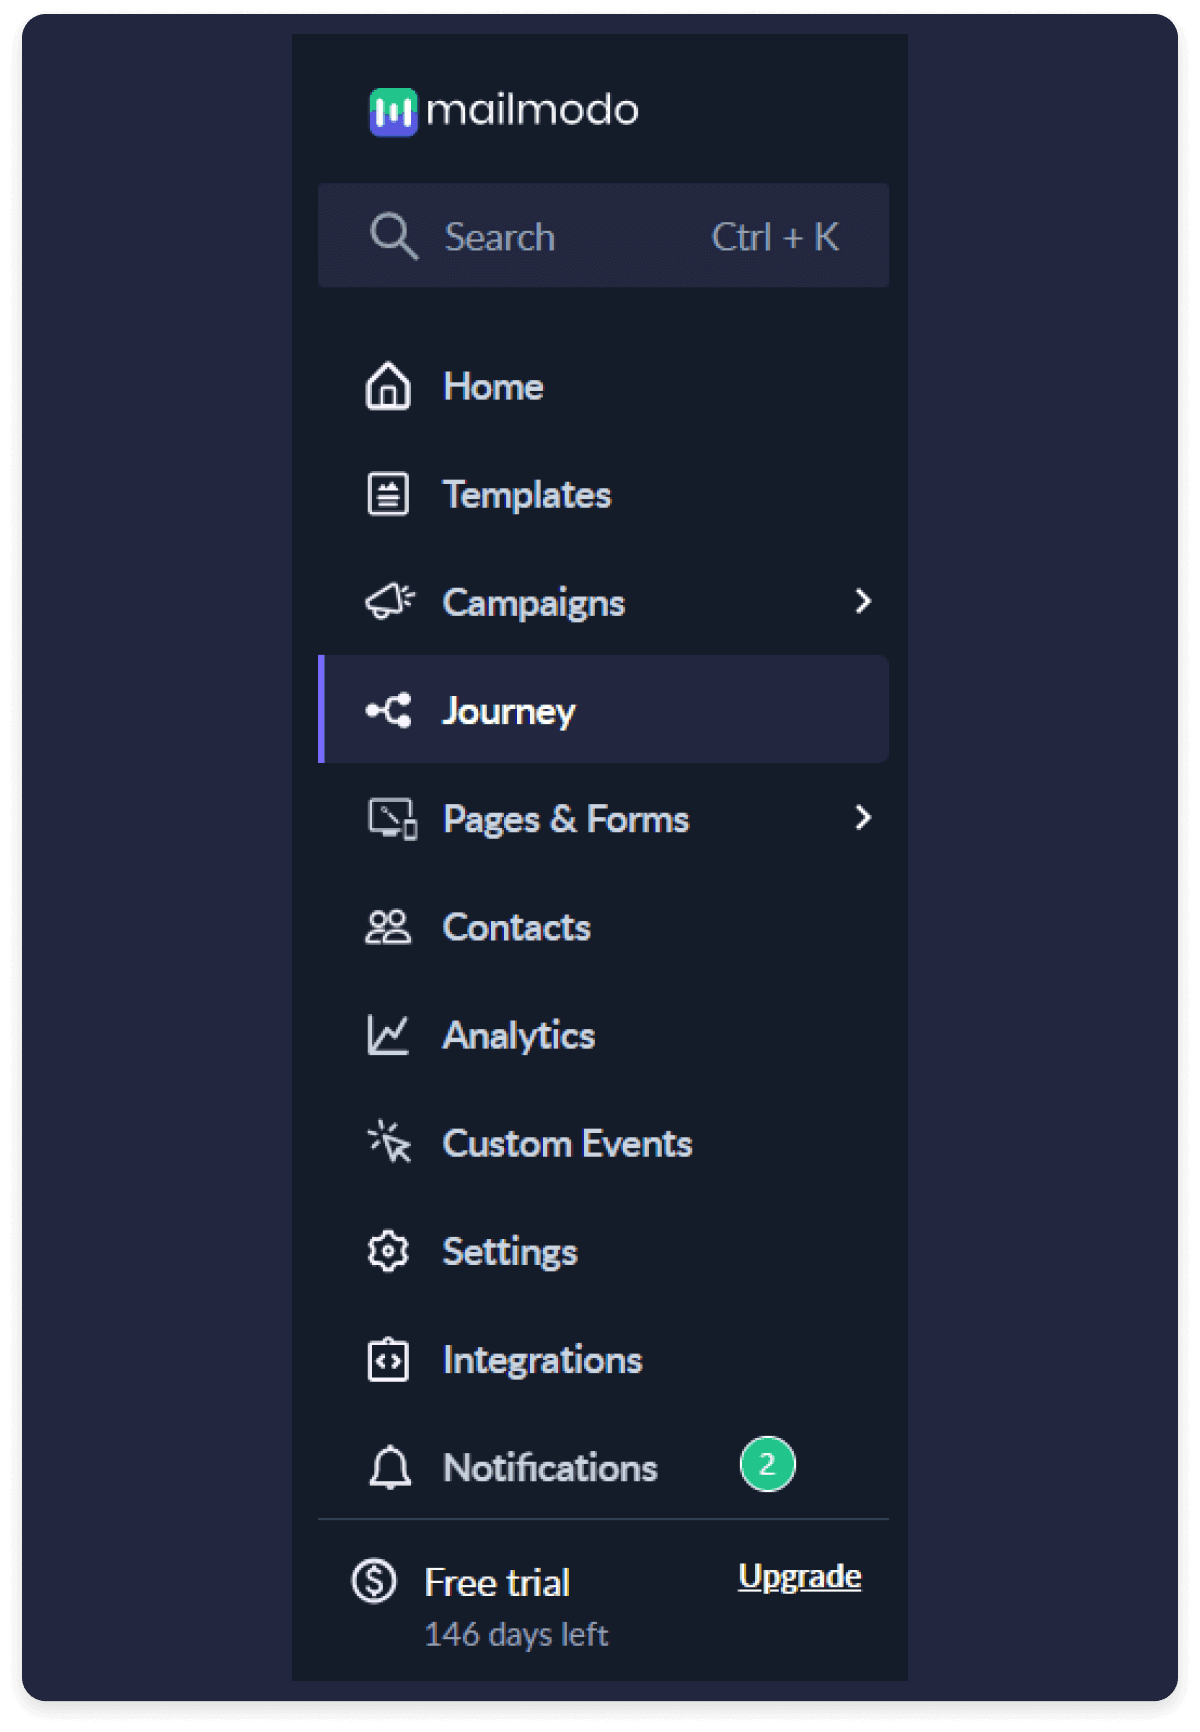
Step 1: Go to the Journey section.
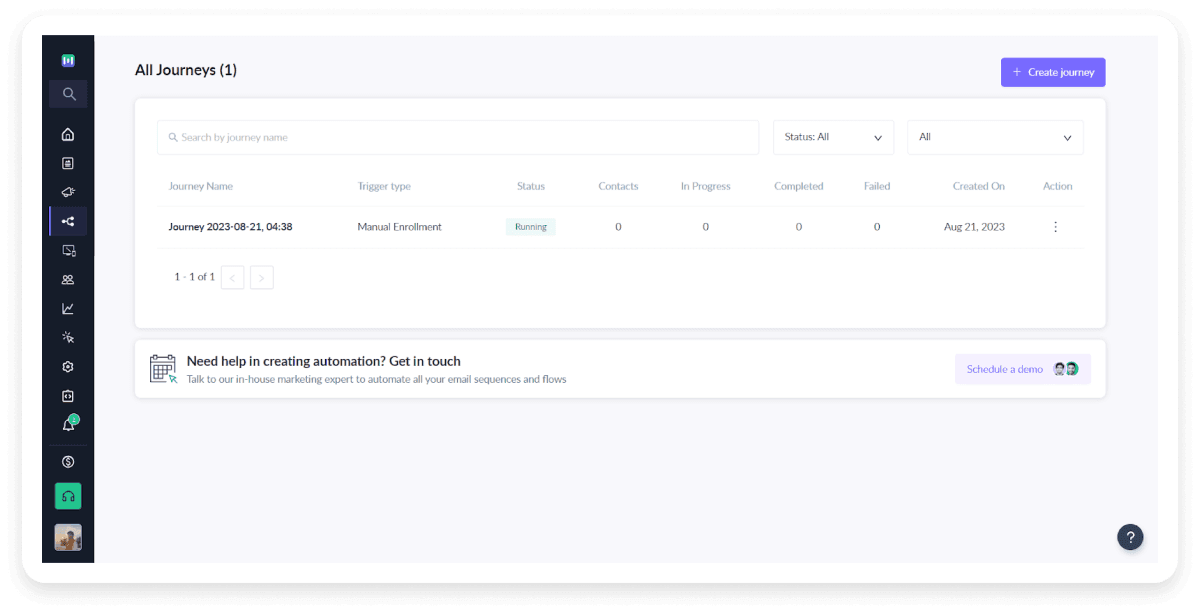
 Step 2: Click on Create Journey.
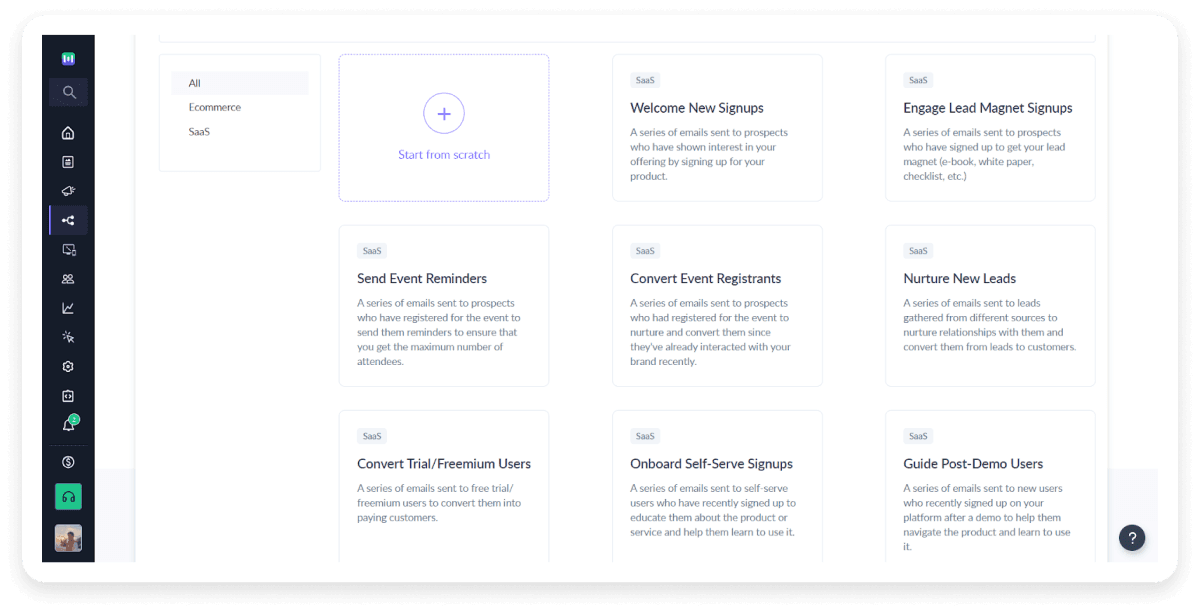
Step 3: Choose a pre-made journey template that matches your requirements and define specifics such as delay and the email to be sent, or create a workflow from scratch.
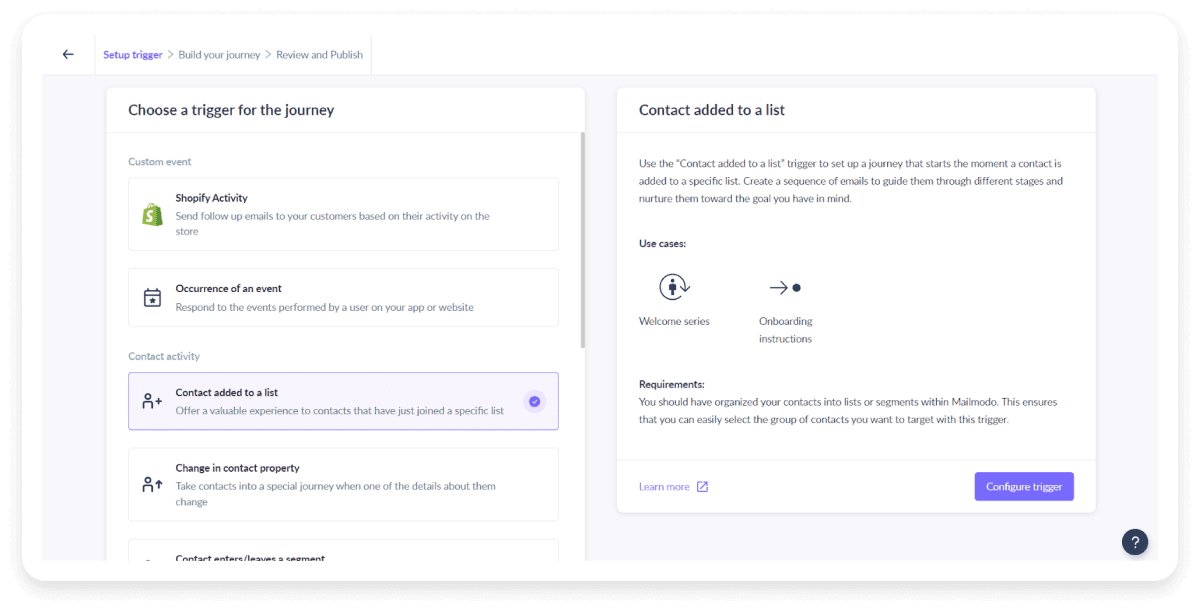
Step 4: If you choose to create one from scratch, you can choose the trigger in the next step. In this example, we’re choosing ‘Contact added to list trigger and then clicking on the Configure trigger button.
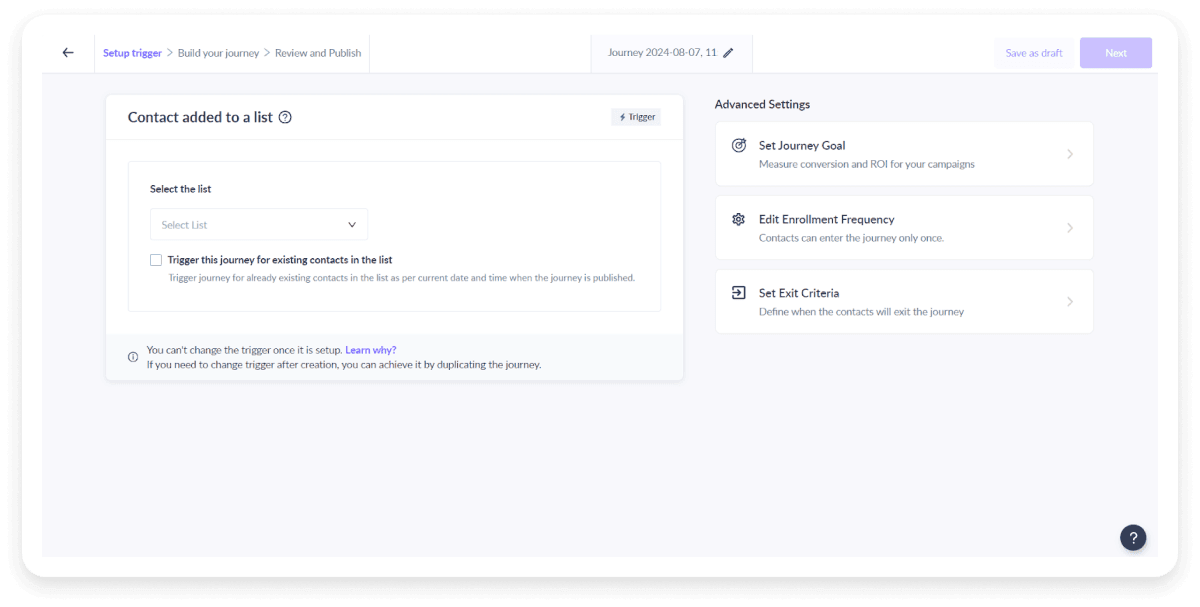
Step 5: Select your list. This is the list in which the contact will be added which will trigger the emails.
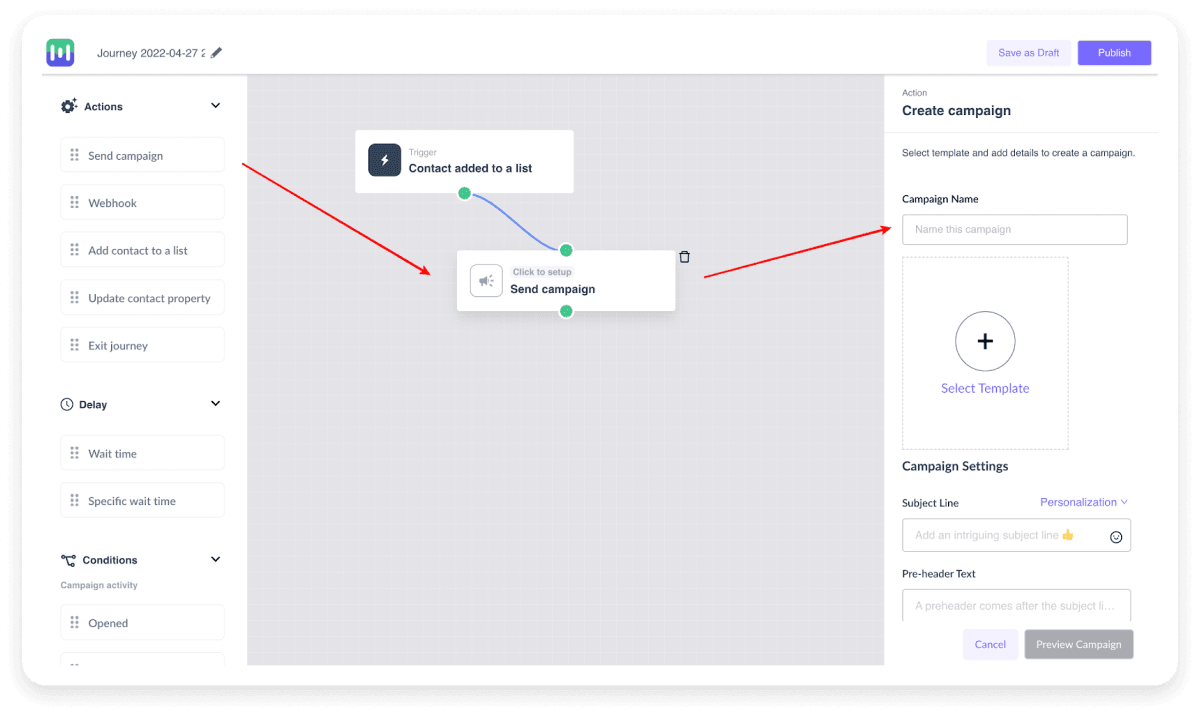
Step 6: Design your workflow by specifying the actions, delays, and conditions. Use the options on the left panel to build a workflow. For example, choose Send Campaign from the left panel and drag it to the blank area.
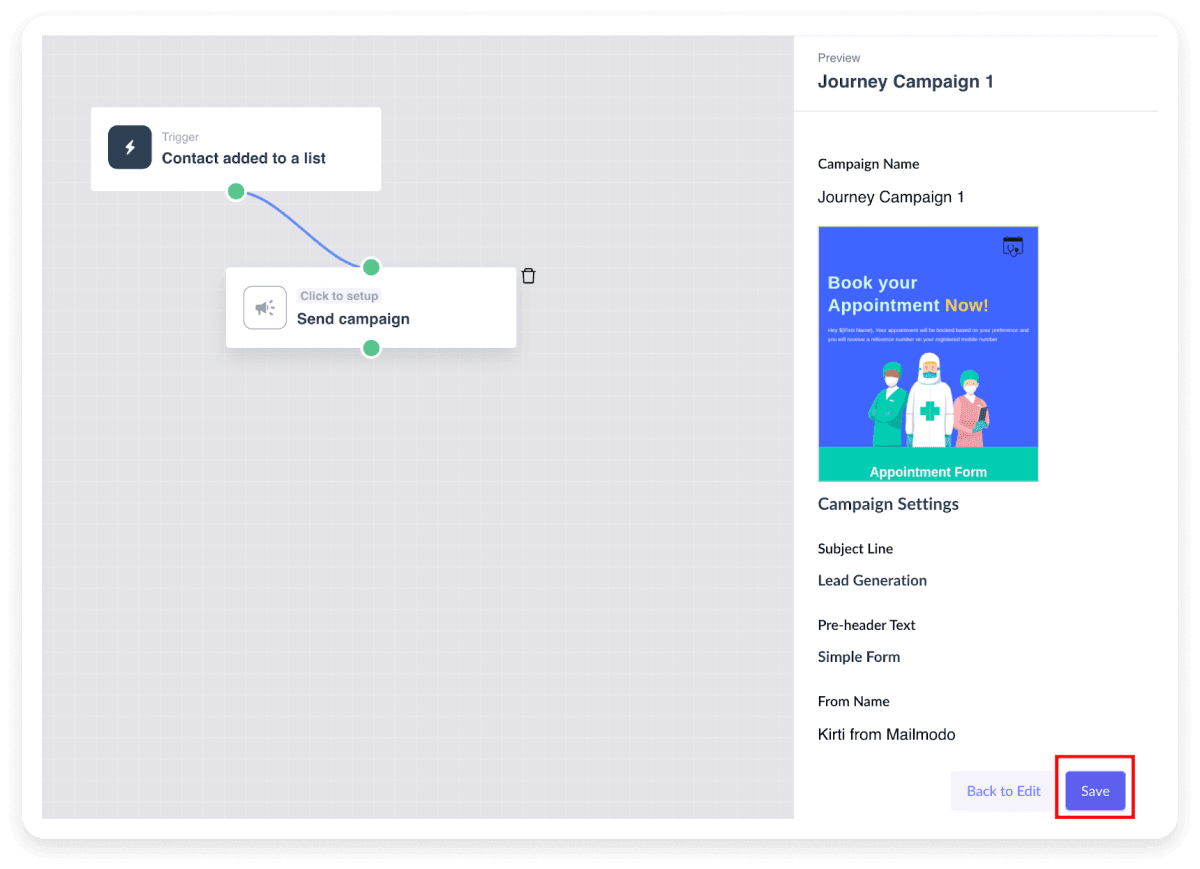
Step 7: Choose the template and enter the requested details to create a campaign, and then click on 'Save’.
Step 8: Specify the below conditions/activity in the journey as needed.
i) Opened: Drag and drop the “Opened” condition from the left panel. Click on Configure Conditions to set wait time on the right panel. This means that when a person opens the onboarding email, a new campaign (such as an email with a demo video link) can be initiated after the specified wait time.

ii) Clicked - You can drag and drop “Clicked” in the same way. For the “Clicked” condition, when a user clicks on a specific link in the email, the next mail can be sent to them after the specified wait time. You can also start different campaigns depending on which links in the email were clicked with the “Specific URL click” option.
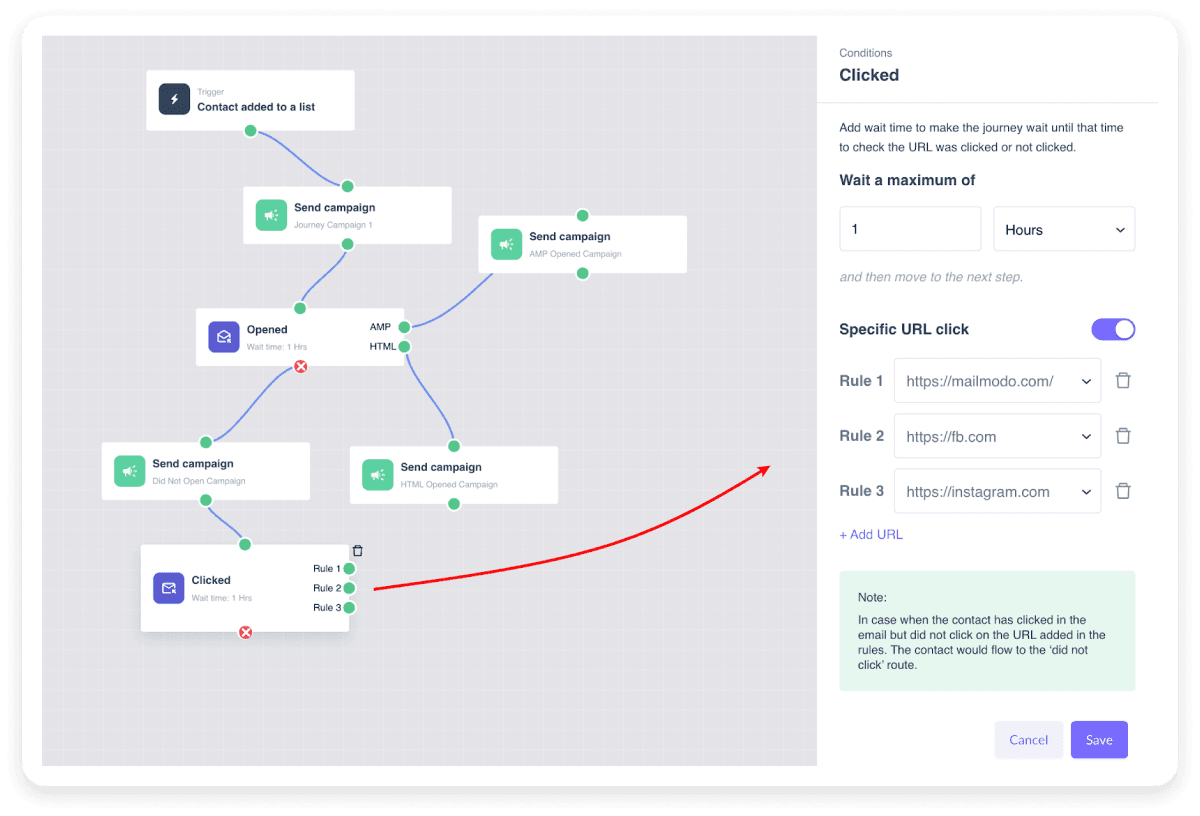
Here, Rule 1, Rule 2, and Rule 3 refer to three different URLs that can trigger different campaigns when clicked on.
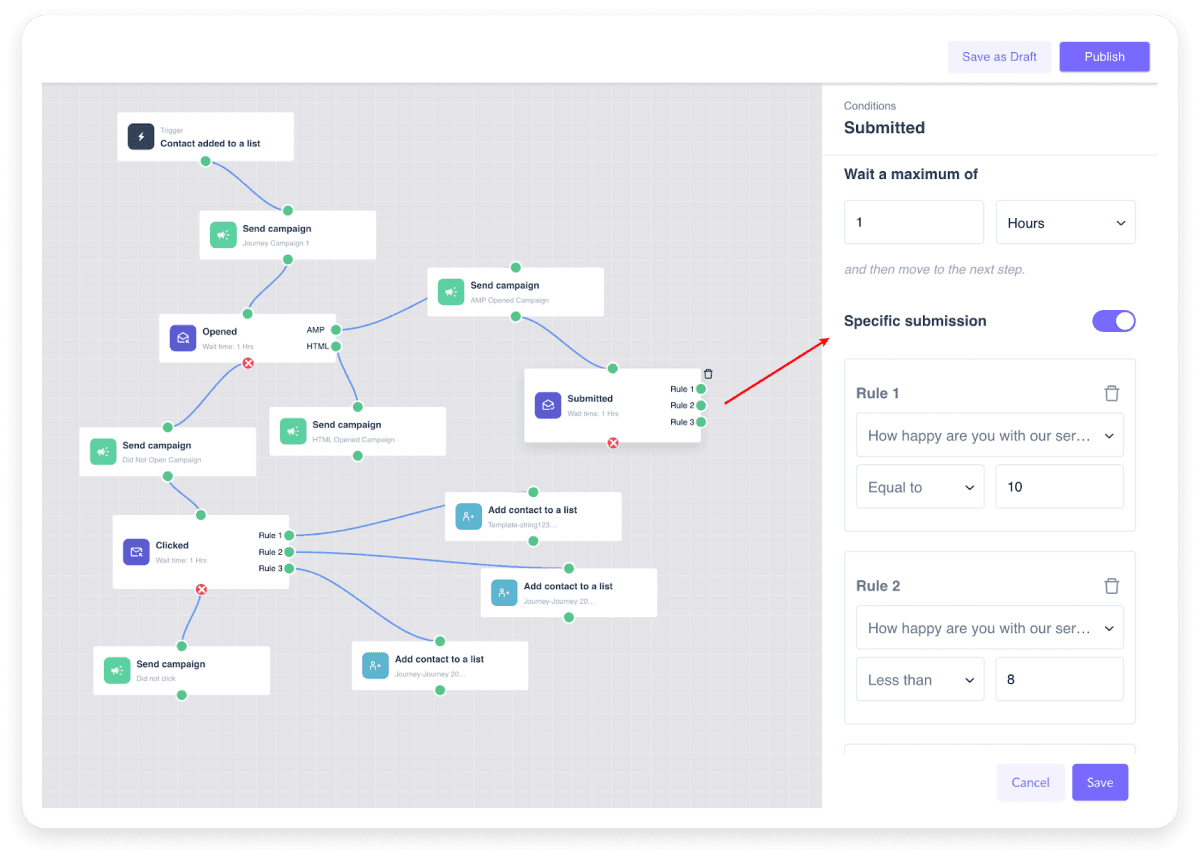
iii) Submitted: You can use this feature in the same way as explained above. It includes ‘Wait Time’ and ‘Specific submission’ options to start different campaigns. ‘Specific submission’ creates conditions/logic based on data obtained from the submitted form.
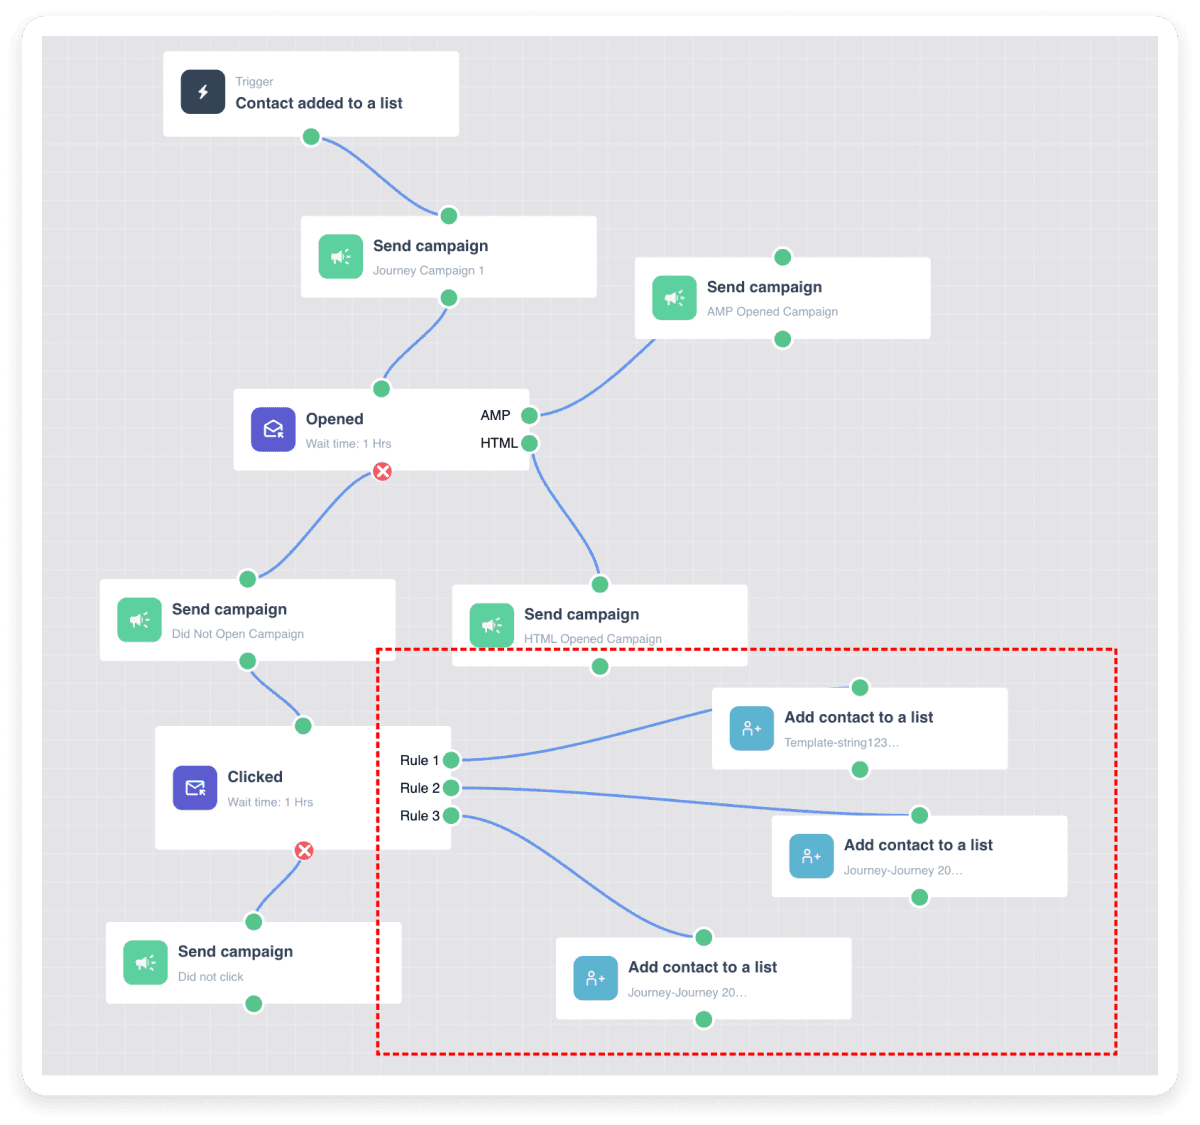
Step 9: Once you have set up the journey, test it first and then click on Publish in the top right corner.
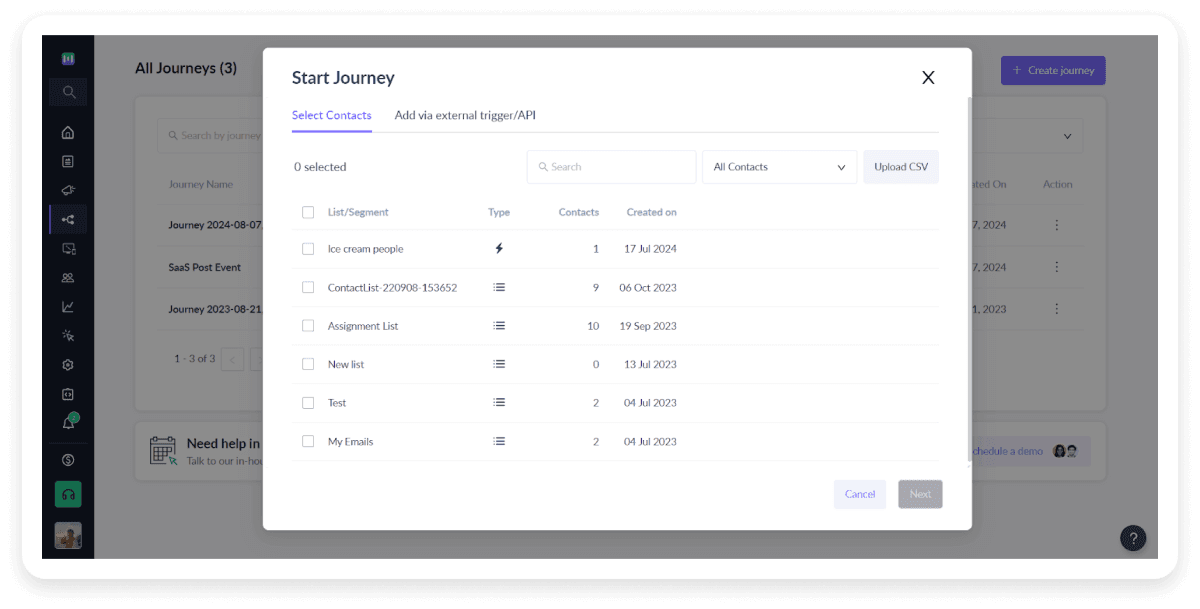
Step 10: Once you publish the journey, click on the three dots on the journey that you’ve created in the journey dashboard and then click on 'Enroll Contacts'.
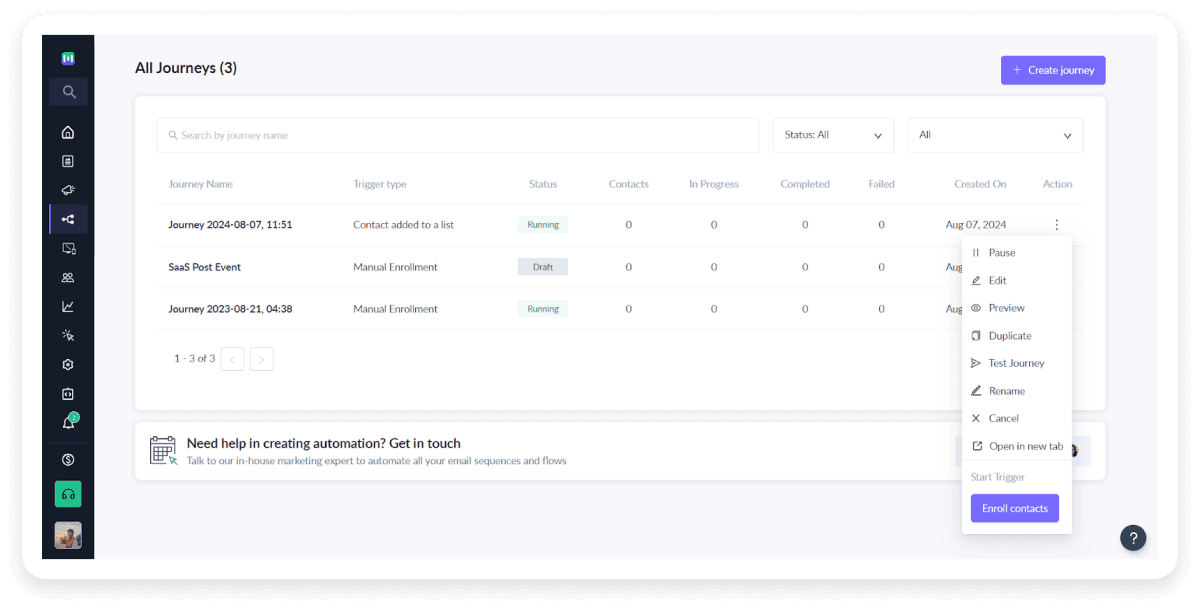
Step 11: Here, you can choose to send it to an existing contact list or upload a .csv file.
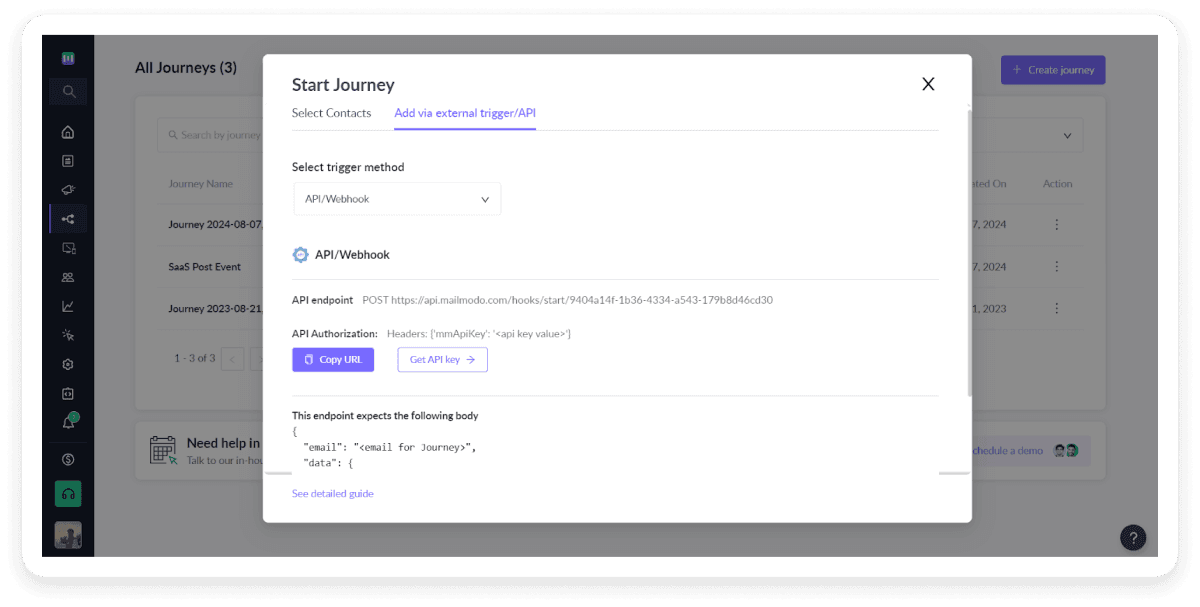
You can also initiate the journey by calling API/webhook or through integrations with platforms like Zapier, Make, and InfluencerBit.
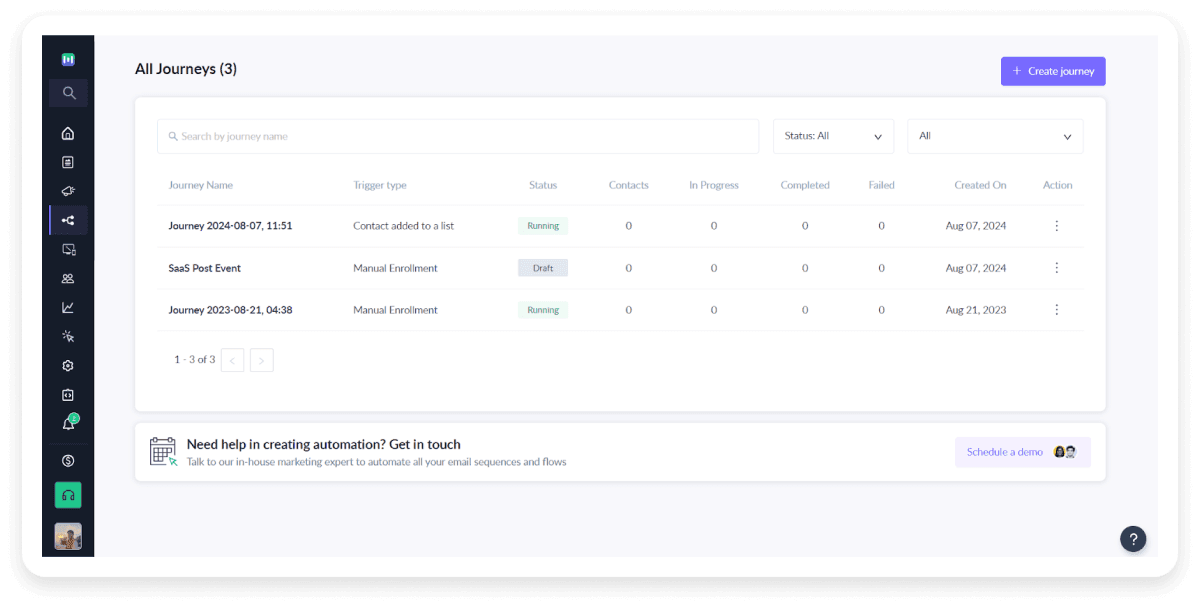
Once that is done, you’ll be able to see its status changed to ‘Running’ in the dashboard.
Create your first email workflow
Conclusion
Effective email automation workflows not only save time by eliminating the hassle of tracking and sending new emails for each customer in the customer journey, but also make it easy to nurture leads, build relationships, and drive conversions. By setting up email workflows, marketing teams can also shift their focus to more creative and strategic aspects of their marketing efforts, ensuring that your efforts are both efficient and impactful. So set up your first email workflow today and prepare to scale your email marketing efforts for a more successful and streamlined email marketing process.


