What are Google annotations?

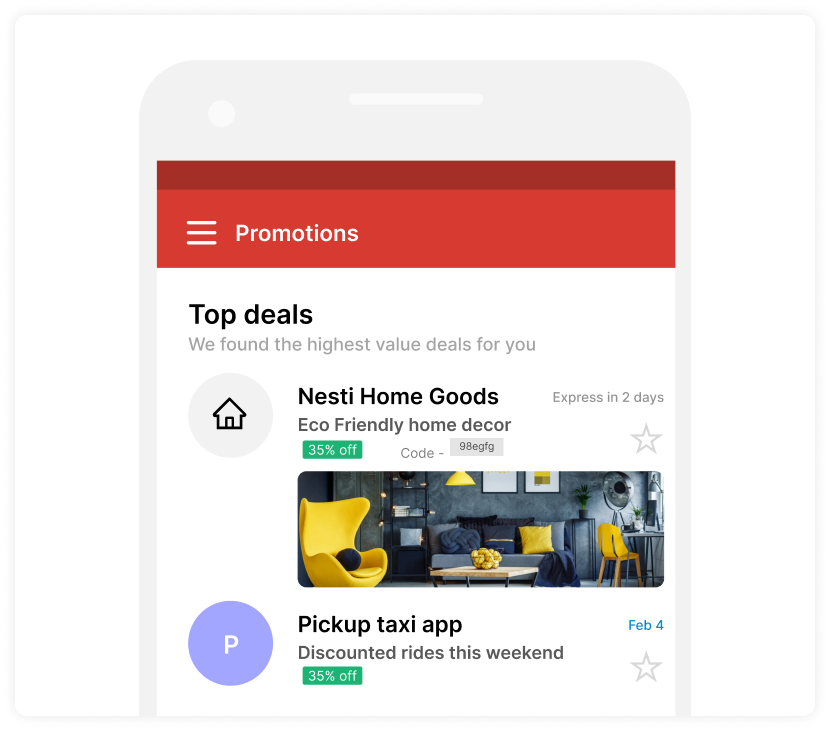
Google annotations is a revolutionary way to bring your promotional emails to life by adding key information to preview content for highlighting it, giving you access to more than just the subject line. It’s equal parts visually inspiring and valuable.
Technically, it is a snippet of HTML code that you place in your email header. In the inbox, the code snippet displays numerous pieces of information from your email.
Google has a tool to create an HTML template for your Gmail annotations. All you have to do is change the produced code snippet to display the data you desire.
As of now, Google annotations are only visible in the Gmail promotions tab on the mobile apps on iOS and Android. Google will reportedly roll them out for desktop users in early 2023.
What can you customize with Google annotations?

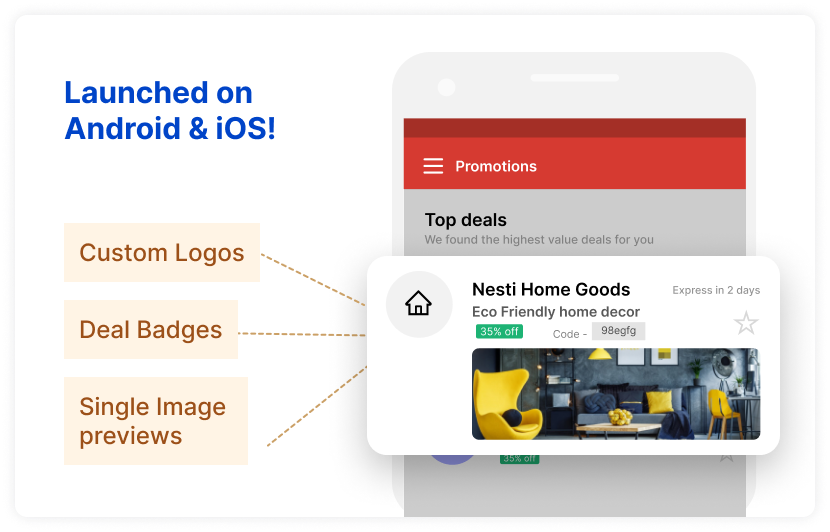
Email marketers can customize 6 elements with Google annotations, including:
• Logo
The logo appears in front of the sender's name. In Gmail settings or Gravatar, you can set the sender logo for Google annotations.
• Business name
It is best to select a sender name that's connected with your business or one that you use for all campaigns.
• Banner
The performance of annotations with a banner is supposed to be better. Avoid using the same image for several annotations since readers may mistake them for duplicates.
• Deal badge
If you're sending your users a discount offer email, display it in the annotation by specifying the discount amount. Also, keep it short irrespective of whether you’re using a static or a dynamic discount code.
By displaying the promo code in the annotation, you instill a sense of trust in your users, who will, in turn, engage with your email more.
• Expiration date
Finally, specify to what date your offer lasts to create a sense of urgency in your users. Annotated emails with a discount expiration date are given two chances to appear in the inbox reminder. The first reminder is sent when your email is delivered. The second reminder is sent before the discount expires.
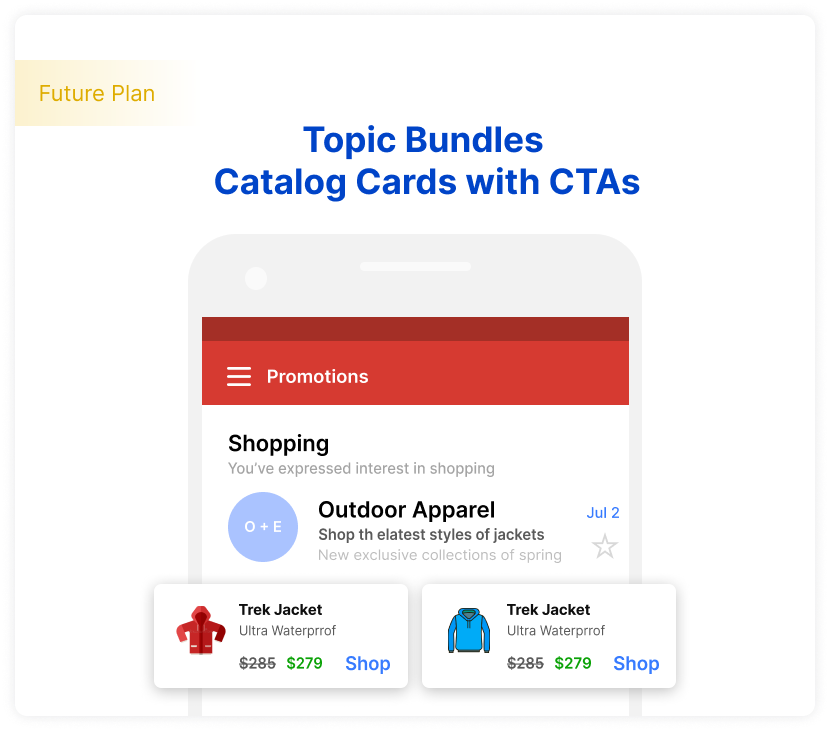
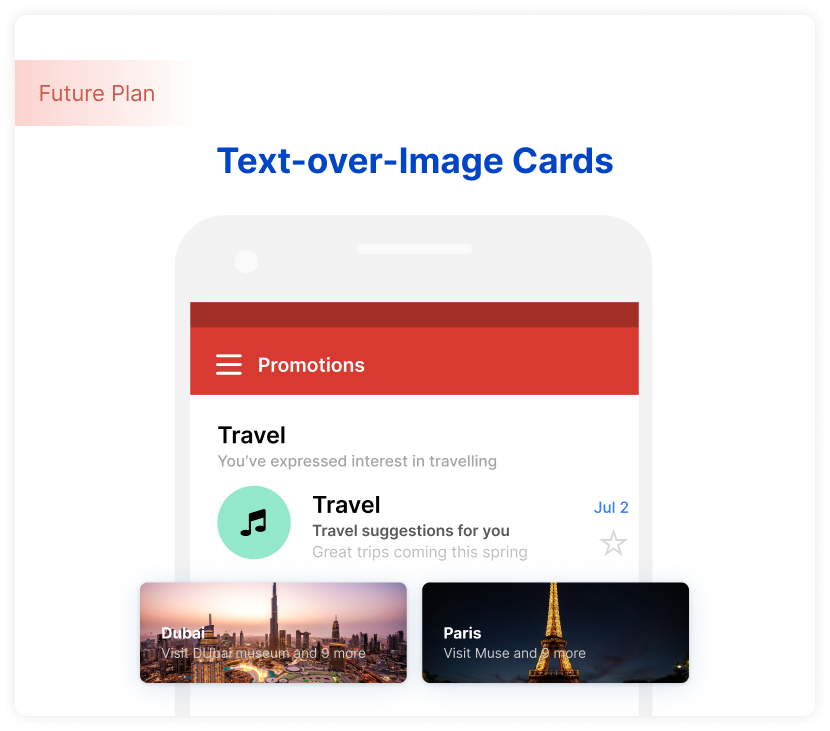
The future use cases for Google annotations comprise:

• Catalog cards with calls-to-action

• Catalog cards for events

• Text-over-image cards
How are Google annotations useful?
This new feature can help Mailmodo users stand out by hyper-personalizing emails. B2C email marketers can leverage Google annotations for seasonal offers, PPC, and email campaigns to boost click-throughs and open rates.
Ash Eldifrawi, Chief Marketing Officer at Redbox, said,
After annotating our email with the Redbox logo and rich images of our movie night experience, we saw dramatic increases in open rates, external clicks, and conversions from Gmail users.
Since Google uses machine learning algorithms to pick Top Promotions, a brand’s sender reputation, ESP reputation, and user preferences take center stage. With Mailmodo, you can engage better by revamping your promotions and offers with AMP emails. Checkout Mailmodo's use cases.
How to create annotations?
Mailmodo allows you to send emails from your Gmail ID using Google's SMTP. You can use your email address configured on any organization’s domain to create annotations. Here’s a step-by-step guide on how to do it:
Step 1: JSON-LD and Microdata are both supported by Gmail and can be used to markup information in emails. Edit the code below to include the annotation as JSON-LD in a script tag in the email's head HTML:
<!DOCTYPE html PUBLIC "-//W3C//DTD HTML 4.01//EN">

<html>

<head>

<script type="application/ld+json">

[{

"@context": "http://schema.org/",

@type": "Organization",

"logo": "https://www.gstatic.com/images/branding/product/1x/googleg_48dp.png"

},{

"@context": "http://schema.org/",

"@type": "EmailMessage",

},{

"@context": "http://schema.org/",

"@type": "DiscountOffer",

"discountCode": "PROMO",

"availabilityStarts": "2022-03-31T12:07:30-07:00",

"availabilityEnds": "2022-04-03T12:07:30-07:00"

},{

"@context": "http://schema.org/",

"@type": "PromotionCard",

"image": "https://www.google.com/gmail-for-marketers/promo-tab/markup-tool/sample.png"

}]

</script>

</head>

<body>

<p>Email Body</p>

<p>Line 2</p>

</body>

</html>
Step 2: Look for the "logo": "https://www.gstatic.com..." text in the sample code and change the existing URL with your logo's URL using https to see how it will look.
Step 3: Paste the email annotations code into a test email.
Step 4: Send yourself a test mail. In your Gmail app, make sure the following account settings are enabled:
Wrap up
Don’t forget to monitor your email marketing metrics to see how Google annotations impact your email deliverability, open rates, and click-throughs. Read our guide to optimize your email marketing campaigns and explore significant benchmarks to boost your email ROI.


